In user experience design, we use techniques like workshops and interviews to understand users. We turn our research into user stories and process flows. We use personas and wireframes to share our ideas with our teams.
But it’s important to remember the real people we design for. We need to know what happens in their lives. We must see how our product can improve their lives. And that’s where a UX storyboard can help us.
What is a UX Storyboard?
A UX storyboard is a visual tool—one that illustrates a user's experience with a product or service. Designers use storyboards to understand and address user needs as they move forward in the UX design process. Each one consists of sequences of drawings or images, and these sequences show a user's interactions with a product. They also portray the user's emotions and challenges—vital pieces of UX research to work with as the product develops.
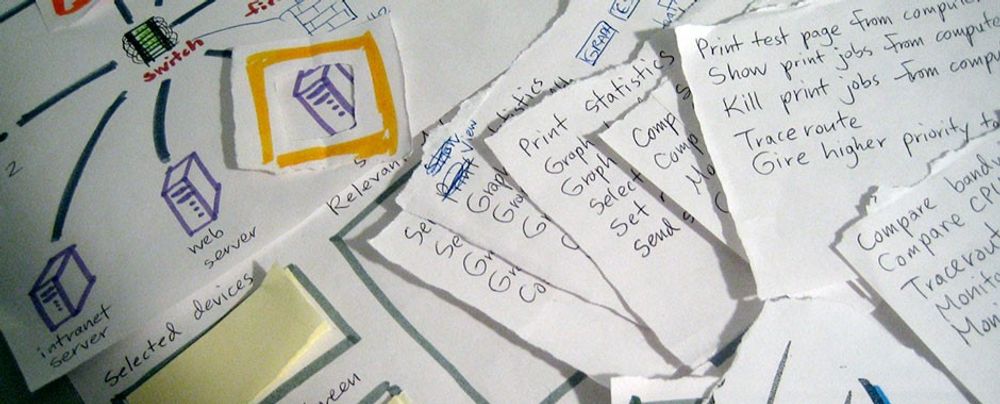
The term “storyboard” refers to a visual organizer, and it shows the development of a sequence, shot by shot. The storyboard includes many panels—each of which holds illustrations or images. These visuals represent individual shots, and notes accompany each panel. They describe what happens in the scene and the script's dialogue. Walt Disney Studios developed the storyboarding technique in the 1930s. They used it to construct coherent stories—stories that became the animated films many people know and love.
Think of the UX storyboard in the same way. Each panel represents a step in the user's journey, and this tool helps designers empathize with users. It helps you create user-centered designs, too. For a design for any type of user, a storyboard is a valuable asset to provide digital product teams, product owners and other stakeholders who refer to it with a pertinent picture of a user flow or journey in action. With an effective visual representation, everyone can keep both a big-picture view of what’s going on and a high level of detail in each part of the sequence.
For example, a storyboard for a shopping app might show a user discovering a product. It then moves on to show the user purchasing the product and receiving it. Through this process, designers may find possible pain points and opportunities for improvement—so making a storyboard a valuable design tool.
Task Analysis—another method—focuses on observing user behavior. Watch Frank Spillers, CEO at Experience Dynamics, discuss this technique in more detail.
Show
Hide
video transcript
- Transcript loading…
Elements of a UX Storyboard

© Interaction Design Foundation, CC BY-SA 4.0
A UX storyboard typically includes three key elements: a specific scenario, visuals and captions.
Scenario: Each storyboard starts with a clear scenario or user story. Outline the persona involved at the top. Include a short, understandable text description of the scenario. This description sets the scene; plus, it makes the storyboard clear to team members or stakeholders. For instance, think about this scenario: "Fitness enthusiast John seeks a user-friendly app to track his daily workout routines."
Visuals: Represent each step in the scenario visually, in sequence. The visuals can be sketches, illustrations, or photos. Pick the style based on your storyboard's purpose and target audience. These images should include relevant details—like the user's environment, speech bubbles, or sketches of the user interface they interact with.
Captions: Accompany each visual with a caption. These brief descriptions cover the user's actions, environment, emotions and interactions. Keep captions concise since you have the image as the primary element. Limit them to two bullet points maximum.
Together, these elements form a UX storyboard. They serve as a visual tool that can communicate the user's journey effectively and reveal things that mightn’t be readily apparent otherwise.
The Role of Storyboards in Product Design
Storyboards greatly help product managers and designers. They're like comic books but intended for different purposes. A UX storyboard shows how users might use a product. It makes it easy to see how people interact with an app or service. This tool also helps to understand users' motivations.
In UX, storyboards map how users will use a product or service. They show each step a user takes. They help predict what might happen. Designers use them like Disney animators did. They help tell the story of the user and the product. This way, designers find problems in the user experience. They can then make it better. Better user experience directly enhances user satisfaction and engagement with a product.
Storyboards help designers share their ideas, too, and they make it easy to show thoughts in a way that's quick and clear. This helps teams work better together. Storyboards in product design turn ideas into real things, and they help make designs that focus on the user. This is a vital aid that leads to a better experience for the user.
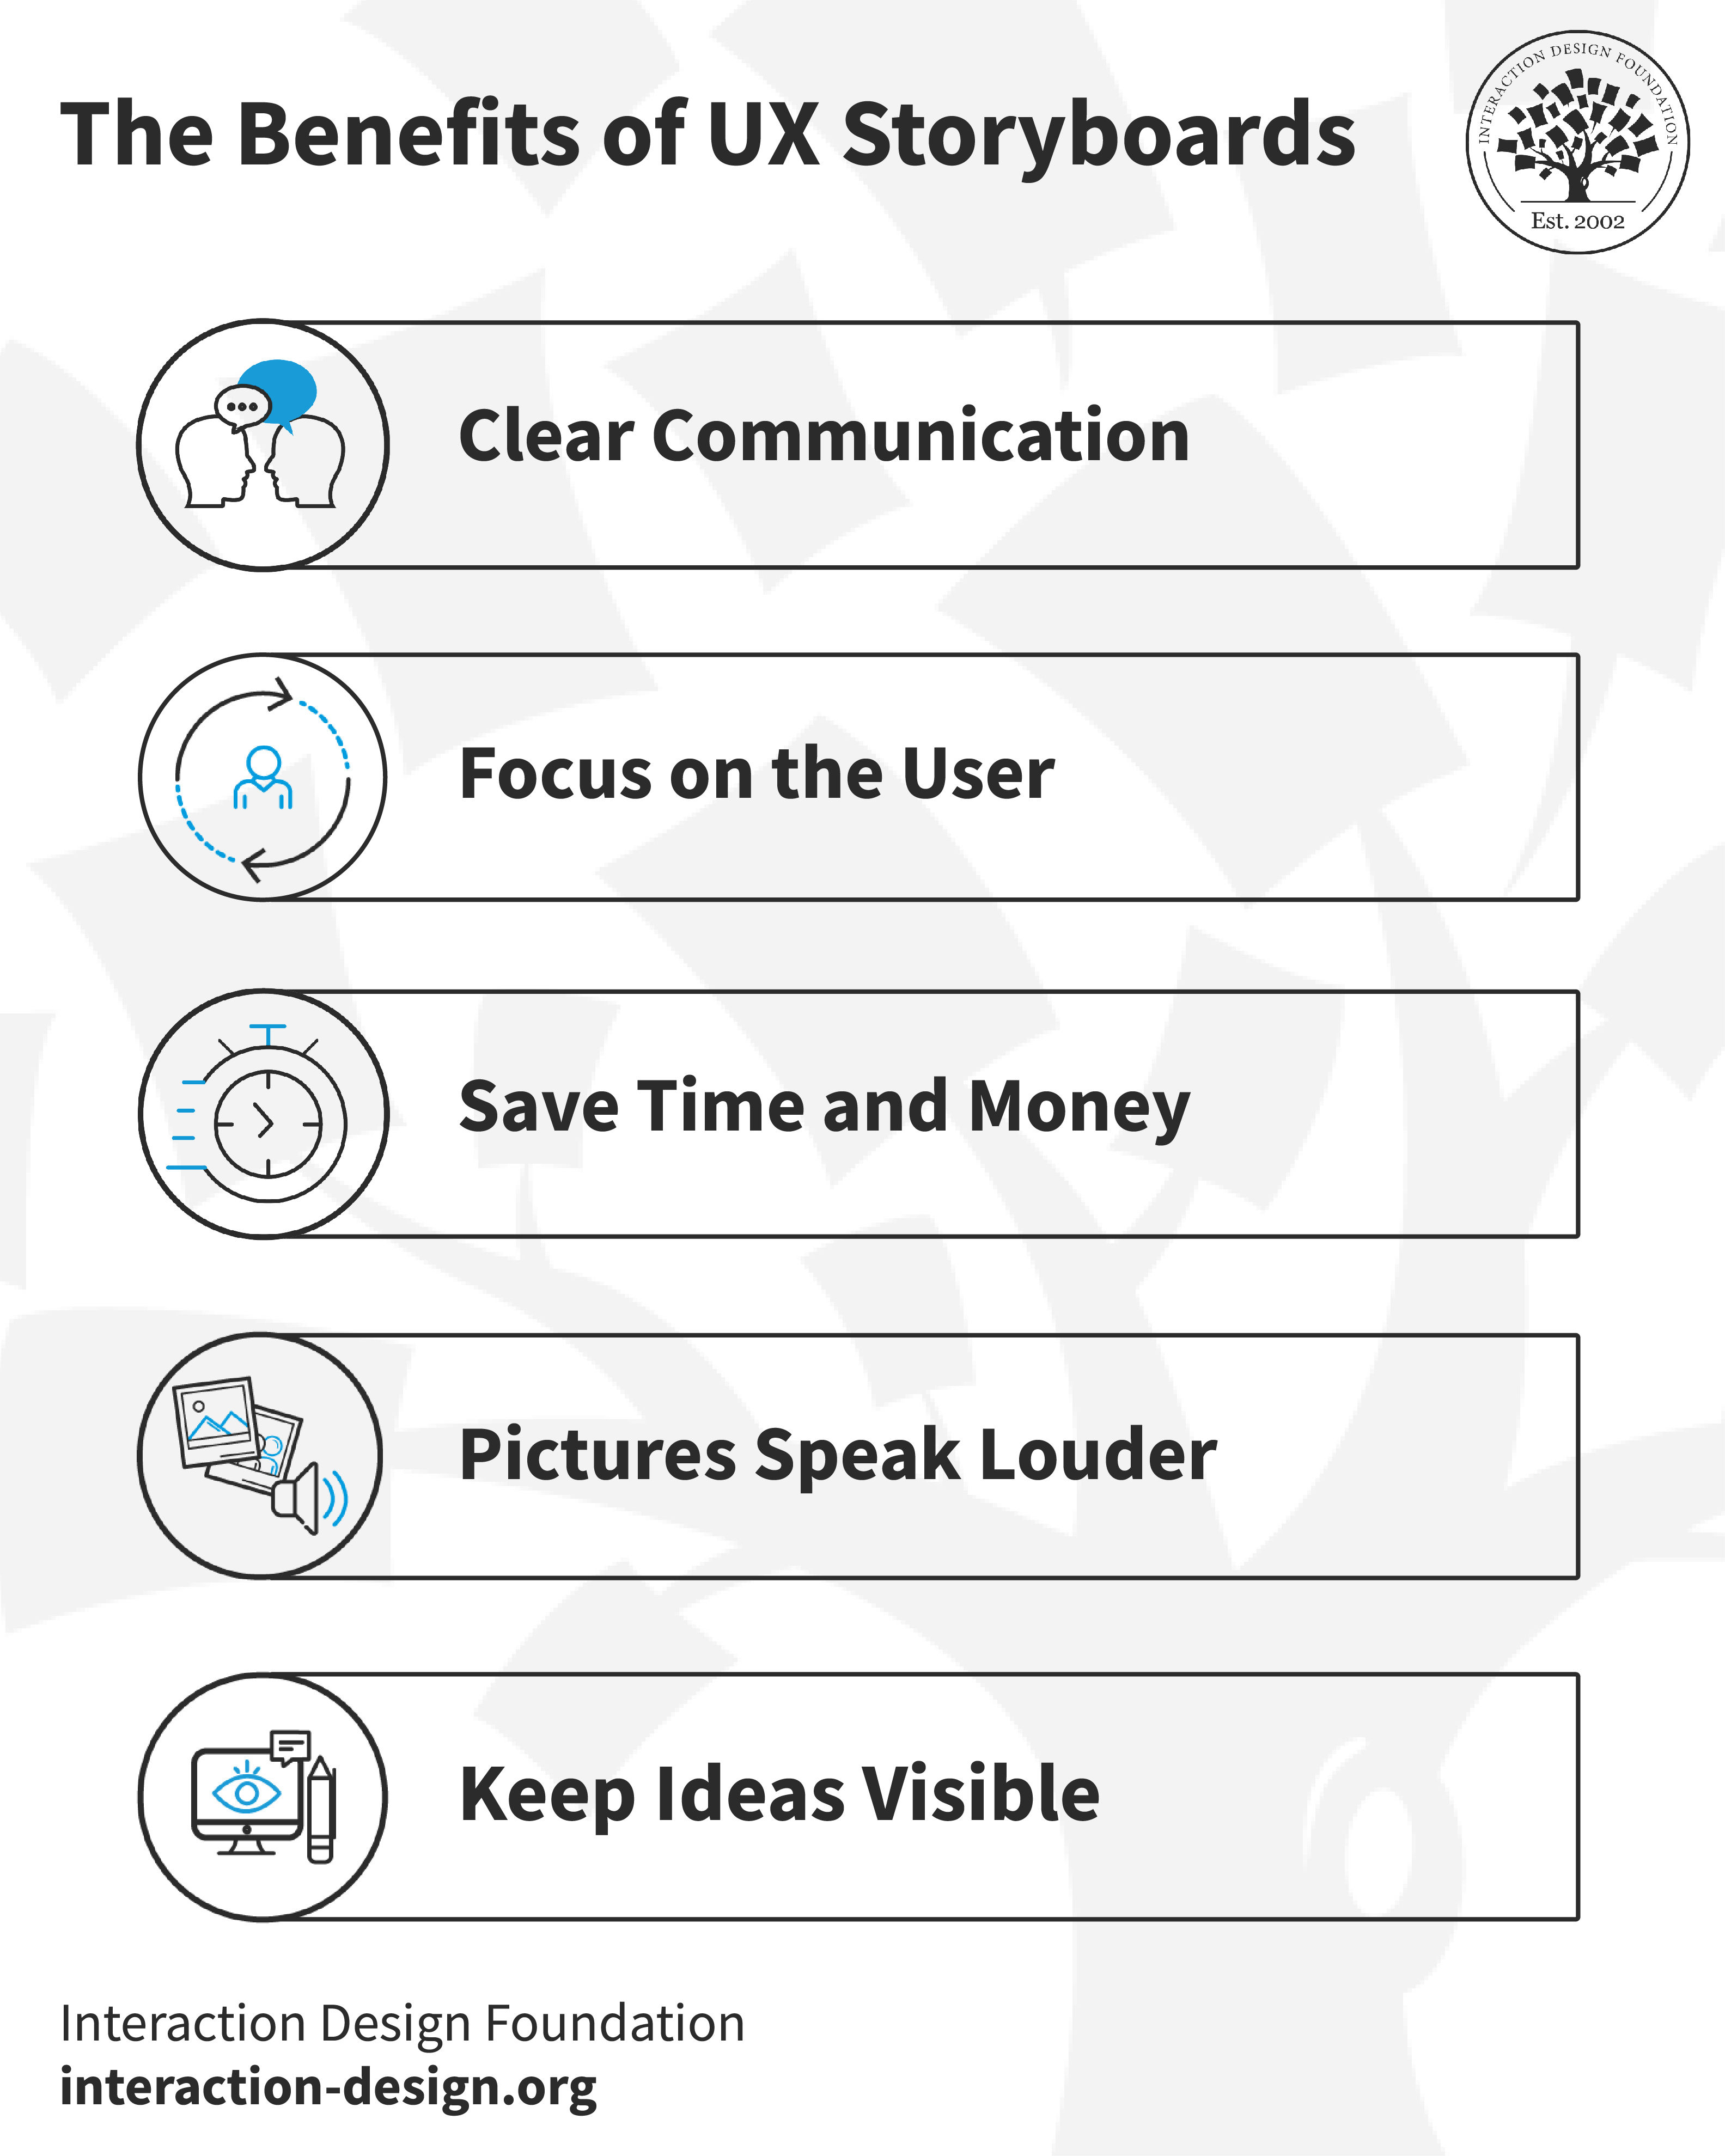
The Benefits of UX Storyboards
UX storyboards are great for design—big helps that use storytelling to make user experience (UX) design better. Let's look at their main benefits.
© Interaction Design Foundation, CC BY-SA 4.0
1. Clear Communication
Storyboards offer a swift and lucid way to share ideas. They use visuals—which our brains process quicker than text—and this is a quality that ensures quick comprehension across teams. It’s also something that leads to better teamwork, with everyone grasping problems and solutions rapidly.
2. Focus on the User
Storyboards are centered on users—a point that makes designers think from the user's point of view. Storyboards make the user's story interesting and easy to relate to, as well. This helps everyone care more about what the user needs in reality.
Good user stories define the user's needs and goals—and they make sure that the development team builds features that truly benefit the end user.
3. Save Time and Money
Storyboarding helps test ideas quickly. Designers can draw a quick storyboard to see if an idea works. From that, they can find out early if an idea is good or not. It stops wasting time and money on ideas that don't work.
4. Pictures Speak Louder
Images in a storyboard tell a stronger story than words can. They make it easier for people to understand and remember for longer, especially if they are not designers. Storyboards make people feel more connected to the story. They focus on real problems and situations, increasing empathy in the process.
5. Keep Ideas Visible
Storyboards make it easier to remember user stories and problems. They're like a quick picture of what's essential. Putting them up where everyone can see them keeps these ideas in mind.
When to Storyboard in UX Design
Storyboarding in UX design is helpful at many stages. This part explains when to use storyboards best.
1. Fuel the Ideation Process
Storyboards can help designers come up with ideas—often great ideas. They let designers sketch how users might use a feature. This helps understand the user's setting before a design team and development team start to build. Storyboards for ideation start conversations. They change as more real data comes in.
2. Guide Feature Prioritization and Team Alignment
Storyboards help show how users use apps. This can reveal a great deal and makes it easy to see which features matter most. What’s more, teams understand what is important together. For example, a storyboard for a login process can show what works for users and what frustrates them. This helps teams decide which features to focus on.
3. Integrate into the Design Lifecycle
Storyboards fit into many parts of the UX and product design process. They are good after researching and before solving problems. Storyboards turn research data into a story with pictures. This helps find main themes and user scenarios. It makes it easier to spot the right problems and think of solutions.
Obtaining relevant research insights forms the foundation for informed decision-making. Watch Alan Dix (Author, Professor and Researcher) discuss the difference between two research methods—qualitative and qualitative.
Show
Hide
video transcript
- Transcript loading…
As mentioned above, storyboards show how solutions might work in the ideation stage. Designers can see how well different ideas meet user needs. This is important before starting the design and building stages.
In the design phase, storyboards guide decisions. They keep the focus on what users need. When design teams look back at storyboards, it helps them stay in line with user needs while designing.
4. Transform Research Insights into Visual Stories
Storyboards can help to explain the results of research and usability testing—and they show how users interact with apps or websites. The use of visuals—instead of just text—makes summaries more engaging. Storyboards can include what users say and their body language, things that help designers to understand user experiences better.
5. Enhance Journey Maps
Storyboards add detail to user or customer journey maps. They show images of users at different stages using a product. Pictures of the user's device, workspace, and group settings help others feel more connected—something that gives a clearer view of the user's world and challenges.
Three UX Storyboard Examples
In UX design, storyboards illustrate how users interact with products. They highlight challenges and solutions in a user's journey. Here, we present examples of UX storyboards.
1. User Journey from App Download to Satisfaction

© Interaction Design Foundation, CC BY-SA 4.0
The storyboard captures a user's journey while they’re engaging with a food app. It starts with the user seeing a commercial prompting them to download the app.
Feeling hungry, they download the app and place an order. As they wait, the app shows real-time updates. Meanwhile, they drive to the restaurant—with their appetite and expectations.
Post-order, the app sends a survey, which the user completes. As a thank-you gesture, the app delivers an e-coupon to their inbox. The final frame also shows the user happy with the food through a smile emoji. It indicates a successful and rewarding user experience.
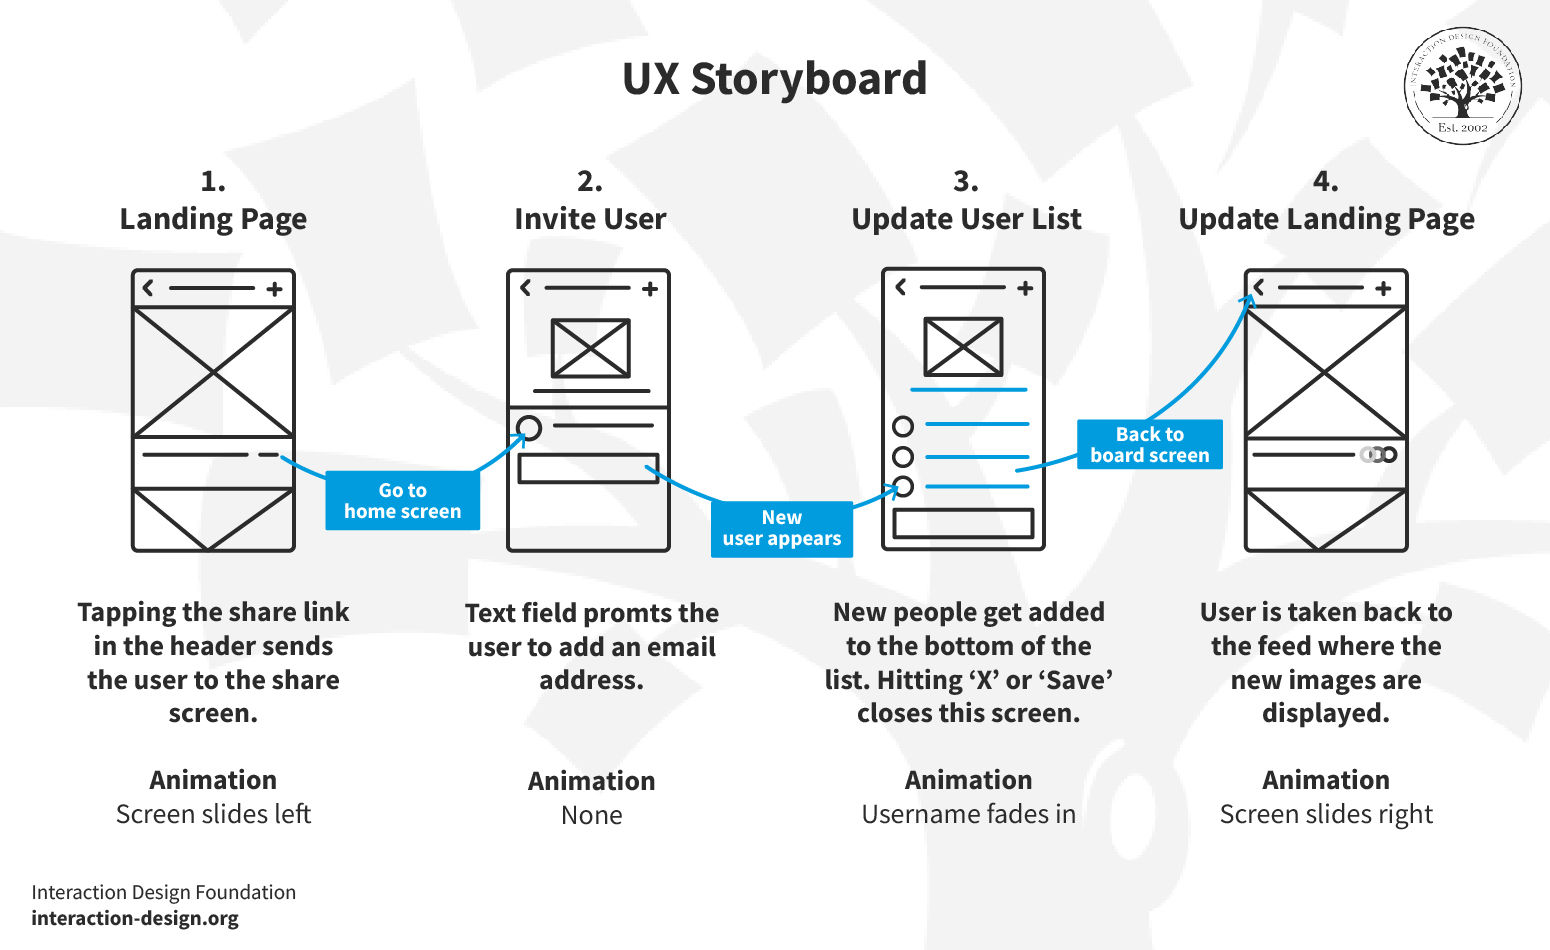
2. Invite a User Made Simple
© Interaction Design Foundation, CC BY-SA 4.0
This storyboard shows a clear path for inviting a new user to a platform. It begins on the landing page. A user taps a share link, and then the screen slides to the left and shows the invite screen.
The focus here is on ease and clarity. The invite screen includes a field to type in an email address, with no extra animation. It's straightforward—type, invite, done.
When the user adds and saves an email, the storyboard takes them to an updated list. A new user's name fades in to show they've joined. This subtle animation confirms the action without fuss.
Then, the user goes back to the main screen. The storyboard closes the loop, and the user returns to the landing page. It's a smooth slide back to the start.
This example shows the power of a clean, simple invitation process. The creator keeps it easy with clear steps and minimal distractions getting in the way. It shows that a good design helps users confidently complete tasks without their getting confused.
3. Effortless App Onboarding
© Interaction Design Foundation, CC BY-SA 4.0
The third storyboard illustrates a user's onboarding journey for a mobile app. The first screen welcomes users to the app designed to find free food locally. The storyboard's simplicity is something that ensures the user knows the app's purpose.
Next, the user signs up for an account where they get three options to Sign up—Google, Facebook or with their email. It’s a quick, two-field form—no clutter, no hassle. This simplicity keeps users engaged and not overwhelmed by the process.
Next, the app asks for more personal details. These include the name, address and phone no. This info helps the app include more personalization to the user’s journey.
The storyboard then shows the app in use. The users can see multiple restaurant options available to them. They can quickly find a suitable restaurant and place their order. This quick success shows the app's value right after sign-up. Last, the app completes the process with the “Order Placed” screen. It shows the exact wait time for the order delivery, too.
This example shows the effectiveness of a clear, step-by-step onboarding process. The creator made each step purposeful and straightforward. They ensure the user sees immediate value and knows how to deepen their engagement with the app.
Your Step-by-Step Guide to UX Storyboarding
An effective UX storyboard is something that requires careful planning, the right data, and collaboration to narrate the user's journey visually. So, in this section, we’ll walk through the fundamental steps in creating a storyboard that brings the user's story to life.
© Interaction Design Foundation, CC BY-SA 4.0
Step 1: Define the Goal
Before you draw the first box of your storyboard, you’ve got to know where you're heading. Ask yourself: What do you want to achieve? Are you mapping out a new feature or exploring a user's journey through your app? It’s vital to be clear about things here—your goal could range from resolving a specific user issue to presenting a new product idea.
Set a specific, actionable goal to guide your storyboard creation most effectively. This step makes sure that your process remains focused and pertinent. It’s vital to document your goal and communicate it with your team for initial alignment. A precise goal maintains the storyboard’s direction and ensures you take purposeful actions at—and for—every step.
Step 2: Collect and Synthesize Data
You've got a wealth of sources for data collection—including user research, interviews, usability testing, and site metrics. You don't need to use all of them, though. Pick the most relevant sources that will inform your storyboard effectively. Conduct thorough user research, engage in insightful interviews, perform detailed usability tests, and analyze your site metrics to make sure the data you collect is robust.
Once you've collected this data, synthesize it so you can uncover the core user insights. This synthesis will help you understand user motivations and struggles, as well as their success moments. It tells you what users do and—vitally—why they do it. You can craft a storyboard that resonates with real user experiences this way.
Performing this step early sets a strong foundation for your storyboard. It ensures that a solid, user-centered ground backs up the story you'll tell. This makes it a reliable reference to turn to throughout the design process.
Step 3: Choose a Fidelity level
Determine the storyboard's fidelity based on its purpose and the intended audience.
Use simple sketches or sticky notes for internal team discussions. This method facilitates brainstorming and lets you make easy modifications. It supports collaborative creation and the flexibility to adjust sequences.
Create detailed illustrations for client presentations or deliverables using tools like Adobe Illustrator or Sketch. This higher-fidelity approach is one that yields a polished and refined visual.
Focus on clarity and effectiveness, not over-finessing visuals. Select the fidelity that best conveys your story and is well in line with the storyboard's goals.
Step 4: Create a Persona and Scenario
A persona and scenario ground your storyboard in reality. It ensures the story resonates with actual user experiences.
Personas help you understand and address users' specific behaviors, needs and contexts. Alan discusses how to create effective personas in UX design.
Show
Hide
video transcript
- Transcript loading…
Create a fictional yet realistic persona that represents your target user. Draw from research data to make this persona detailed and authentic. Include behaviors, preferences, and needs. This persona becomes a key figure in your storyboard. It guides the story's direction.
Next, it’s vital to develop a scenario for your persona. This scenario is a specific situation where the persona interacts with your product. So, describe the setting—is it at home, in an office, or on the go? What are the other important contexts of use? Is it a noisy office? Are there distractions at home? Detail the challenges and objectives the persona faces. What are they trying to achieve with your product? What obstacles do they encounter?
This step helps you empathize with users and design solutions that meet their needs. It brings great focus to your storyboard.
Step 5: Sketch the Story Steps
Sketch each step of the persona's journey in the scenario.
Start with the initial problem or need for a service.
Show critical actions as they engage with your product.
Include essential moments of interaction, decision-making and the outcome.
Use simple drawings or stick figures for clarity.
Aim to clearly and visually represent the user's journey, and make it both understandable and sequential. This step turns conceptual ideas into tangible visuals. It lays out the user's path clearly and methodically.
Step 6: Add Annotations
Write short notes underneath each picture. Explain what's happening and why the user feels a certain way. This makes the storyboard tell a better story—and be that much more relatable. It helps everyone understand not only what the user does, but how they feel as well. Keep these notes clear but short. They should give just enough information to get the point across.
Here’s an example of John:
Faces a Problem: John struggles to track his daily fitness routine.
Annotation: John struggles with manual fitness tracking and seeks a better alternative.
Discovers the Product: He finds your fitness tracking app online.
Annotation: Intrigued, John stumbles upon the app while searching for fitness solutions.
Initial Use: John downloads the app and starts to input his fitness data.
Annotation: John easily inputs his data. He expects positive changes.
Engages with Features: He explores features like setting goals and tracking progress.
Annotation: John uses a goal-setting feature. He appreciates its ease and usefulness.
Experiences Benefits: John sees improvements in his routine and feels motivated.
Annotation: John notices a tangible improvement in his fitness routine and overall well-being.
Recommends to Friends: Satisfied, he recommends the app to his friends.
Annotation: Happy with his progress, John shares the app with friends, confident it can help them too.
This storyboard with John shows the steps of the emotional journey plus the reasoning behind each action. It provides a deeper understanding of the user experience.
Step 7: Present the Storyboard
Present the storyboard to your team, stakeholders, or clients. Choose a format that suits your audience.
For internal teams, a casual walkthrough might suffice.
For clients or major stakeholders, consider a more formal presentation.
Explain each step with a focus on the user's journey, emotions and the story's flow. It’s important to encourage feedback and discussions. This presentation provides an opportunity to align everyone's understanding and collect those all-important insights for improvements.
Remember, the storyboard acts as a communication tool. So, make sure it conveys the intended message and user experience.
Step 8: Iterate and Refine
After you present the storyboard:
Gather feedback and insights.
Use them to refine your storyboard.
Look for areas that need clarification or improvement.
Adjust the visuals, emotions, or annotations as needed.
This iterative process will help you hone the storyboard into an effective tool. It ensures the final version accurately represents the user experience and meets the project's goals. Refine the storyboard until it resonates with all stakeholders and guides the design process in the best way.
References and Where to Learn More
Read the Forbes article that shares insights on best practices for great UX features on a website. Learn how to visualize your website as a storyboard.
Marli Mesibov takes a real-life example of an app she helped to build in 2017 and explains five steps you can use to help you build a story into your user experience.
Find helpful insights about visual storytelling in Visual storytelling for UI-UX design with examples.