Your constantly-updated definition of Interactive Prototypes and
collection of videos and articles. Be a conversation starter: Share this page and inspire others!
391shares
What are Interactive Prototypes?
Interactive prototypes are working models of a product or app that let users interact with its features as if they were using the final version. These prototypes go beyond static wireframes or mockups and simulate user interactions. Designers use them to test and improve user flows, interface behavior, and the overall user experience.
Interactive prototypes can have any level of fidelity from low fidelity to high fidelity. Low-fidelity prototypes keep things simple and often skip detailed design elements to focus on basic functions and flow. They come in handy for early-stage testing and rapid iterations. High-fidelity prototypes, however, look a lot like the final product, with detailed design, interactions, and sometimes even real data. These prototypes work well to test the finer points of the user experience and get feedback from stakeholders.
Why Are Interactive Prototypes Important?
The Nielsen Norman Group says that testing interactive prototypes with just five users can reveal up to 85% of usability issues. This shows how well interactive prototypes work to find design problems before full-scale development starts, which helps save time and costs.
What’s more, these prototypes help to connect abstract design ideas with real-world user experiences.
Overall, interactive prototypes help:
Early Testing of Design Ideas
Designers can detect possible usability or interaction issues by testing interactive prototypes with users early on in the design process. For instance, if a design team tests a mobile app prototype, they might find that users have trouble finishing a certain task because buttons aren't clear or the app's layout is hard to follow. Designers can act on this early feedback and make needed changes before they start building the app. This saves both time and costs.
Better Communication
Interactive prototypes make it easier for designers, developers, and stakeholders to communicate and avoid misunderstandings. They give everyone a picture of what the product will work and look like. For example, a mock-up of a new online shopping site can show everyone how users will move around the site, what it will look like, and how people will use it.
Lower Development Costs
Testing with prototypes can significantly cut down building costs. When teams identify and fix issues before they start coding the product, they can avoid expensive do-overs and extra work. For example, it costs way less to find navigation problems in a prototype than to fix them after the product is already built.
Happier Users
Interactive prototypes help make products that work for users. When designers get users involved in the process early on and make changes based on what their feedback, they can build products that not only do the job but that are also a pleasure to use. For instance, a prototype of a gaming app can reveal whether the game works and if it keeps players interested and having a good time.
When teams use interactive prototypes as they design, they end up with products that not only succeed but also make users happy.
What Types of Interactive Prototypes Are There?
Interactive prototypes vary in their level of detail and interactivity. Here’s an overview of the main types:
1. Low-Fidelity Prototypes
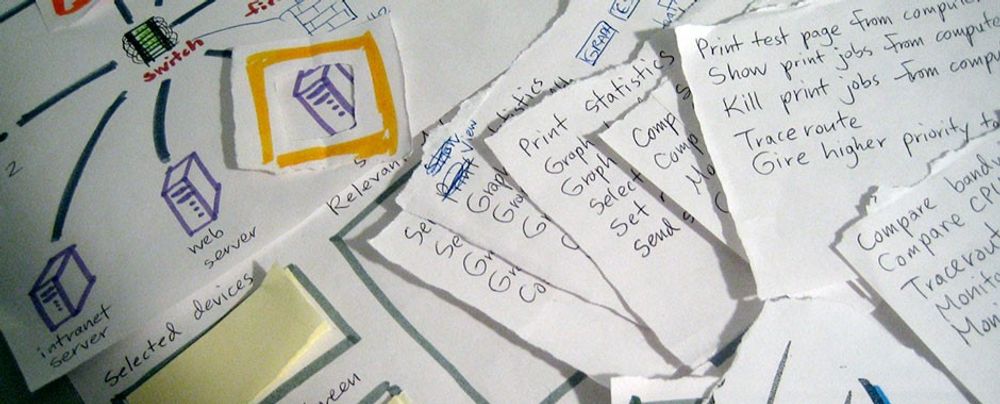
Low-fidelity prototypes are basic sketches or wireframes that include minimal interactive elements. For example, a designer might create a clickable flow where users can navigate between a few screens by clicking on buttons or links. This level of interactivity helps to validate basic navigation and user flow without emphasizing design details.
In this video, see how to transform a paper prototype into an interactive prototype.
ShowHide
video transcript
Transcript loading…
2. High-Fidelity Prototypes
High-fidelity prototypes are detailed, interactive models that closely mimic the final product. They include fully functional buttons, transitions, animations, and realistic content. They allow users to experience the design as they would in the finished product.
A team designing an e-commerce platform might create a high-fidelity prototype that simulates the entire shopping experience—from browsing products, adding items to the cart, to the checkout process—complete with animations, real product images, and responsive design.
Clickable wireframes are a mid-fidelity option that incorporates clickable elements into otherwise static wireframes. Users can interact with different parts of the design, navigate between screens and understand the structure and layout.
A designer creating a new coffee app might use a clickable wireframe to allow users to click on profile icons, leading them to different options, and explore basic navigation, without final design aesthetics.
Functional prototypes are highly interactive and often include complex interactions, transitions, and live data integration. These prototypes simulate the product’s full functionality, allowing thorough testing of user interactions and system responses.
For example, a design team working on a health-tracking app that connects with wearable devices might build a functional prototype that lets users interact with a dashboard showing real-time data from their wearable, complete with detailed graphs, notifications, and goal-setting features.
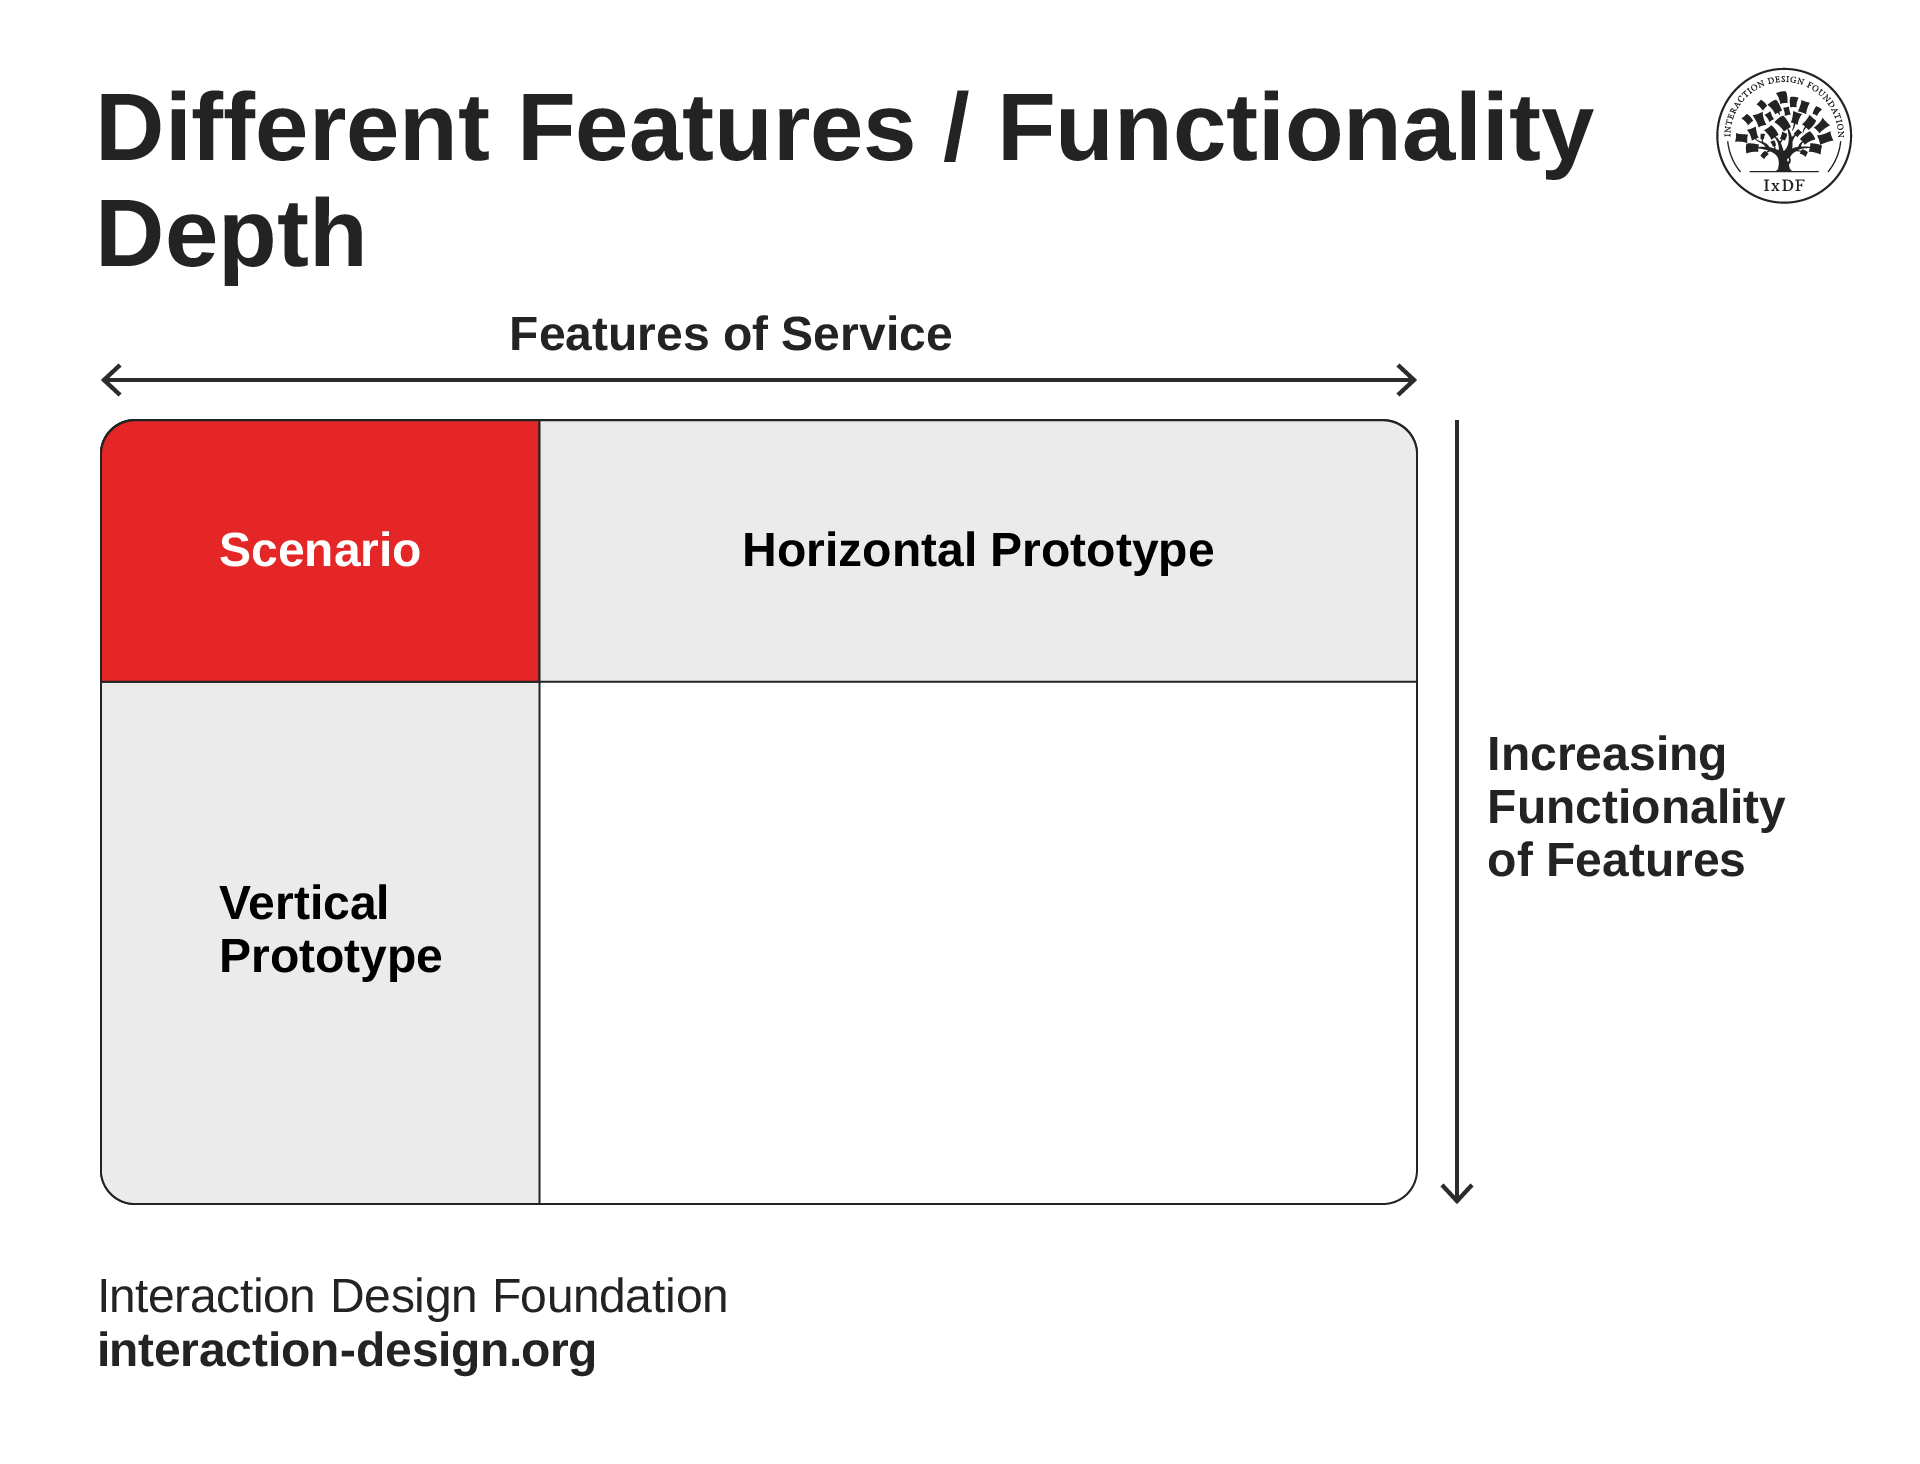
5. Horizontal Prototypes
Horizontal prototypes provide broad interactivity across multiple features but with limited depth. Users can interact with various features, gaining a holistic view of how the product might work, without deep functionality in any one area. For example, while designing a new project management tool, a designer might use a horizontal prototype to let users click through different modules—such as task management, calendar integration, and file sharing—offering an overview of how these features work together.
Vertical prototypes focus on deep interactivity within a few key features, which allow for detailed exploration of specific parts of the product. This type of prototype is ideal for testing and refining complex interactions in critical areas of the design.
For example, a team designing an educational app with interactive quizzes might create a vertical prototype that focuses solely on the quiz feature. This prototype would allow users to interact with questions, receive instant feedback, and view detailed results, which is key to ensure that this crucial part of the app is intuitive and engaging.
Best Practices to Combine Prototypes:
To maximize the effectiveness of prototypes, designers should combine different types strategically throughout the design process. They start with low-fidelity prototypes for quick validation of ideas and user flows. As the design progresses, move on to clickable wireframes or horizontal prototypes to test broader aspects of the product. Finally, high-fidelity and functional prototypes help refine detailed interactions and gather feedback from stakeholders or users before development.
Best Practices for Prototyping
In this video, Game UX leader Om Tandon shares expert tips on how to make the most of prototyping: tool selection, prototype types, and best practices.
ShowHide
video transcript
Transcript loading…
Interactive Prototypes for VR
Interactive prototypes for 2D mobile apps or websites and virtual reality (VR) differ significantly, especially because of the 2D versus 3D nature of each platform. Screen-based prototypes are confined to a 2D plane, where all interactions occur on a flat screen. Designers focus on elements like layout, visual hierarchy, and touch-based interactions such as tapping, swiping, and pinching. The challenge lies in optimizing these interactions within the limited screen space, without needing to consider depth or spatial orientation.
In contrast, VR prototypes operate in a fully immersive 3D environment, which requires designers to think spatially. In VR, designers must consider how users will navigate through space, interact with objects, and perceive depth. Elements like object placement, user movement, and spatial sound are crucial to creating a realistic and engaging experience. Prototyping in 3D often involves using tools like Unity or Unreal Engine, with testing conducted through VR headsets, which gives users a sense of presence within the virtual world. This 3D aspect adds complexity, making the design process more intricate compared to the relatively straightforward nature of 2D mobile app prototyping.
In this video, XR Designer, CG Artist and Author Cornel Hillmann shares an example of how to create interactive prototypes for VR.
ShowHide
video transcript
Transcript loading…
Elevate Your Portfolio: Showcase Interactive Prototypes
To effectively showcase interactive prototypes in a design portfolio, designers need to demonstrate both their design thinking process and the functionality of the prototypes. Here's how to do that:
1. Set the Scene and Define the Problem
Introduce the project with a clear problem statement. Explain the project's goals, target audience, and any constraints you faced. This sets the stage for understanding the decisions made during the prototyping process.
2. Show Your Design Journey
To truly impress potential employers or clients, demonstrate your design process in its entirety. Highlight the steps you took to arrive at the interactive prototype. Include sketches, wireframes, and user flows to demonstrate your design thinking. This shows potential employers or clients that you approach problems systematically and consider multiple aspects before arriving at the final design.
3. Use Interactive Media
Incorporate videos, GIFs, or embedded prototypes directly into your portfolio. Tools like Figma allow you to create shareable links or embed interactive prototypes directly on your portfolio website. This lets viewers experience the interactions firsthand and gives them a real sense of the prototype's functionality.
4. Highlight Key Interactions
Focus on showcasing the most critical interactions and user flows within the prototype. Showing everything overwhelms your audience and makes it hard for them to focus on what matters. This dilutes the impact of your best work. By highlighting only the key parts, you ensure your message is clear and memorable. Use annotated screenshots or short video clips to explain why certain interactions were designed the way they were. Highlight elements like animations, transitions, and user feedback mechanisms to show how these enhance usability.
5. Provide a Narrative
Guide the viewer through your prototype with a narrative that explains your design choices. Discuss why you chose specific interactions, how you tested them with users, and what feedback you incorporated. This demonstrates your ability to iterate and improve based on user testing and feedback.
6. Show Usability Testing Results
If you conducted usability testing, include key insights and how they influenced the final prototype. Mention any changes made based on user feedback to emphasize your user-centered approach.
7. Display Before-and-After Comparisons
If applicable, show how your prototype evolved from initial concepts to the final version. Use side-by-side comparisons or timelines to highlight improvements and refinements made during the process.
8. Link to Live Prototypes
Whenever possible, provide links to live prototypes so viewers can interact with them directly. This is particularly effective for showing dynamic elements and the overall user experience. Make sure they work properly in all devices.
9. End with Reflections
End each project with reflections on what you learned, what you might do differently in the future, and how the project impacted your growth as a designer. This adds depth to your portfolio and shows that you are a reflective and evolving professional.
What are some highly cited papers about interactive prototypes?
Wasserman, A.I. and Shewmake, D.T. (1982) ‘Rapid prototyping of interactive information systems’, ACM SIGSOFT Software Engineering Notes, 7(5), pp. 171–180. doi:10.1145/1006258.1006289.
Liu, L. and Khooshabeh, P. (2003) ‘Paper or interactive?’, CHI ’03 extended abstracts on Human factors in computing systems - CHI ’03, p. 1030. doi:10.1145/765891.766132.
Bastide, R., Navarre, D. and Palanque, P. (2002) ‘A model-based tool for interactive prototyping of highly interactive applications’, CHI ’02 Extended Abstracts on Human Factors in Computing Systems [Preprint]. doi:10.1145/506443.506457.
What are some recommended books that cover interactive prototypes?
Designing Interactions by Dan Saffer: While not exclusively focused on prototyping, this book provides a strong foundation in user-centered design and interaction design principles, which are essential for effective prototyping.
Mastering UX Design with Effective Prototyping: Turn your ideas into reality with UX prototyping by Apurvo Ghosh.
The Design of Everyday Things by Don Norman. This book emphasizes the importance of user-centered design and provides valuable insights into creating intuitive and user-friendly interfaces. It covers the principles that underpin high-fidelity prototyping.
How can interactive prototypes improve user testing?
Interactive prototypes significantly enhance user testing by creating a realistic experience that closely resembles the final product. This approach allows users to engage with the design naturally, revealing usability issues, navigation difficulties, and emotional responses. Unlike static wireframes, interactive prototypes enable designers to collect real-time feedback and adjust accordingly.
Interactive prototypes highlight issues early in the design process by allowing users to perform tasks that mimic real interactions.
What are the differences between low-fidelity and high-fidelity interactive prototypes?
Low-fidelity and high-fidelity prototypes differ mainly in detail and interactivity. Low-fidelity prototypes are simple and focus on layout and flow. Designers use them early in the process to test broad concepts quickly and make fast iterations. By contrast, high-fidelity prototypes are more detailed, featuring polished visuals and realistic interactions. These prototypes are used later to refine usability and ensure the design meets user expectations.
Start with low-fidelity to explore ideas, then use high-fidelity to validate details and usability.
How do you present an interactive prototype to stakeholders?
To present an interactive prototype to stakeholders, start by framing the problem it solves and the user journey it supports. Walk through key interactions, focusing on how users will navigate and why specific design choices were made.
Allow stakeholders to interact with the prototype themselves and highlight how it benefits business goals, such as user satisfaction or efficiency. Keep the presentation focused on core features and their impact, and invite feedback for further iteration.
Can interactive prototypes be used for A/B testing?
Yes, interactive prototypes work well for A/B testing by comparing different design versions to see which performs better. By creating two interactive variations, you can gather user feedback early on to determine which design leads to better engagement or usability.
Testing with prototypes helps validate design decisions with real user data, allowing adjustments before moving to development. This saves time and ensures the chosen design resonates best with users.
What are the common mistakes to avoid when creating interactive prototypes?
When creating interactive prototypes, avoid overcomplicating them—focus only on key features to gather clear feedback. Poor user flows cause confusion, so ensure each interaction smoothly guides users. Always involve users early to catch usability issues, and set clear objectives for your prototype to measure success effectively. Don’t forget device context—design interactions to suit their intended platform, like mobile or desktop.
How do you gather feedback on an interactive prototype?
To gather feedback on an interactive prototype, start by conducting usability tests with real users. Observe how they interact with the prototype, noting any difficulties or confusion. Ask open-ended questions to understand their thoughts and gather qualitative insights. Encourage users to think aloud while navigating the prototype to uncover usability issues.
You can also use online surveys to gather structured feedback on specific aspects, like visual appeal or ease of navigation. Tools that track interactions, such as click heatmaps or session recordings, help pinpoint friction points users face. After collecting feedback, organize it into actionable insights to refine the prototype iteratively.
Earn a Gift, Answer a Short Quiz!
Question 1
Question 2
Question 3
Get Your Gift
Try Again! IxDF Cheers For You!
0 out of 3 questions answered correctly
Remember, the more you learn about design, the more you make yourself valuable.
It's Easy to Fast-Track Your Career with the World's Best Experts
Master complex skills effortlessly with proven best practices and toolkits directly from the world's top design experts. Meet your expert for this course:
Morgane Peng: Designer, speaker, mentor, and writer who serves as Director and Head of Design at Societe Generale CIB.
All open-source articles on Interactive Prototypes
Is the future of user experience design (UX design) going to exist on screens or will it find immersive, three-dimension
615 shares
3 mths ago
Open Access—Link to us!
We believe in Open Access and the democratization of knowledge. Unfortunately, world-class educational materials such as this page are normally hidden behind paywalls or in expensive textbooks.