UX case studies are all about the work you’ve done and how you progressed from an initial problem statement to the delivery of a finalized product. Describing a process instead of just a collection of visuals is the key difference between a UX portfolio case study and a Visual Design portfolio. You need to show the “road” you took to reach your destination, having decided on, and kept to, the best route. So, we want a story to flow that represents this journey. Now, we will explore the tips and tricks you can use to show your process, alongside your case study visuals, so recruiters can see how organized and resourceful, among other attributes, you are.
If you take a simple exercise in searching Google for “UX case study tips”, you will encounter many articles with quotes from UX professionals and recruiters about what your case studies should look like. It’s very easy to see that they all converge on the same advice: A UX case study is a story, one that describes the process of the discoveries that you made while tackling a UX challenge.
For the story to be told, your case study can’t just be a series of photos, design artifacts or screen grabs. These may mean a lot to you, but they don’t reveal very much to anyone who wasn’t part of your project. UX recruiters are primarily interested in your way of thinking: How did you decide that this was the right approach to solving a challenge? Why is this design detail like this and not like something else? How did you work to decide between the possible alternatives? How did you involve users in the process? How did you carry out your evaluations? Quite simply, a flat visual can’t answer these questions.
“Having a really strong portfolio where you can talk through your whole process, not just showing research, user flows, wireframes, etc, but turning it into a story for example why you moved onto each part of the process so a hiring manager can really get inside your thought process.”
Tom Cotterill, UX Recruiter at Source LF
What content should I put in a UX case study’s process section?
The trick to storytelling in UX case studies is to use a combination of visuals and text. In fact, remember that text here is probably more important than visuals, in the sense that all the crucial information is something you should describe textually, with visuals adding support, impact and credibility to your textual descriptions of the process. This doesn’t mean that you should focus more on the text than on the visuals – both are equally important. However, if you are to build a good UX case study, you should understand the distinct role that text and visuals play in bringing the story to life.
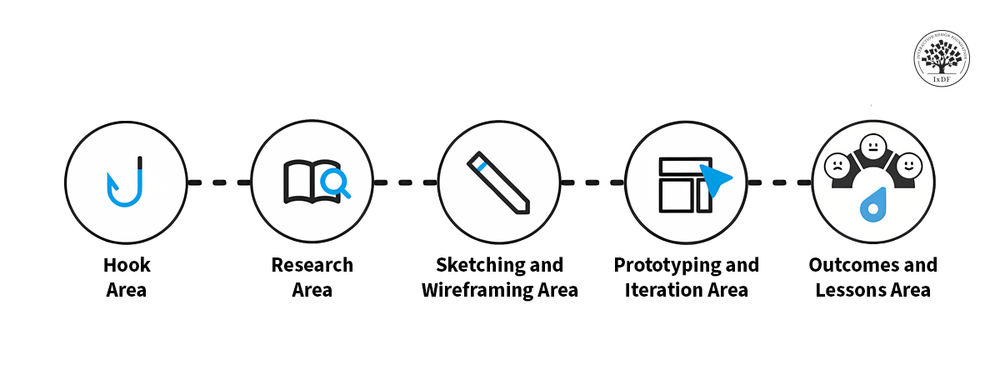
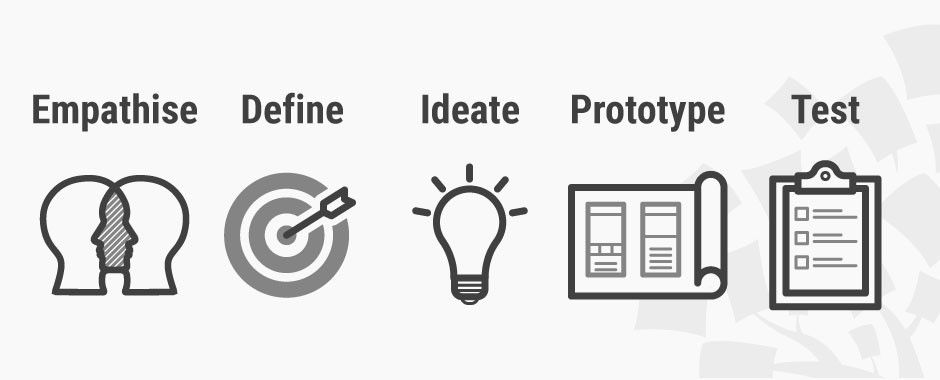
Just like every story, UX case studies unfold along a timeline – a series of events that lead to the final product. Therefore, you can lay out your story sequentially, as if it were a number of steps, with each step taking you closer to the end deliverable. Laying out the story in steps doesn’t just help you put events in a logical order for the recruiter to follow; it also highlights that you have an understanding of a methodological process, such as Design Thinking. So, you might take the core elements of Design Thinking as the steps that you need to outline in the case study.
You might argue here that Design Thinking is not a linear process, and you would be right to say so. However, the case study can’t be structured effectively when the reader has to skip back and forth between phases of development. To solve the problem, you could state at the start that UX projects don’t follow a linear methodology, but for the purposes of the case study, you will describe the various work done during different phases in a linear structure (and outline what that structure will be).
Author/Copyright holder: Teo Yu Siang and Interaction Design Foundation. Copyright terms and licence: CC BY-NC-SA 3.0
Structure your case study sections linearly to show the work you did in each of the phases of the Design Thinking process. Start with Empathy, then Define, then Ideate, then Prototype, and then finally move on to the Test, or evaluation, phase. You can throw in bits of evaluation in every other step, too – for example, during the ideation phase, how did you evaluate alternatives to select which one to take forward?
When writing down the things you did during the process, remember the “why” question which will pop up in the recruiter’s head while reading your case study. Why did you do this? Your text has to be written with this question in mind: I did this (great, but why?), because I needed to solve a problem (here is your answer). Thus, you can write sentences like the following: “To build empathy at the start of the project, I carried out interviews with 20 users”, or “To decide between design alternatives, I conducted heuristic evaluations of all possible designs”.
To strengthen the “I did this” part, you can now begin to use visuals. For example, if you carried out a co-design session with some users, a simple photo of your users sitting around a table, with Post-its, markers, sheets of paper, etc., adds veracity to your statement – hey, they really did do this. It also adds confidence in your skills – hey, it looks as if they truly know how to do this properly.
You can also use visuals to strengthen the “why” part. For example, if you had many alternative designs to choose from, showing a few of these alternatives adds veracity to the level of challenge that you addressed – hey, they really had to work hard on deciding which alternative is best – and also confidence in your skills – hey, they must be very imaginative and are not shy about exploring all the possibilities!
What types of visuals should you include in your UX case study?
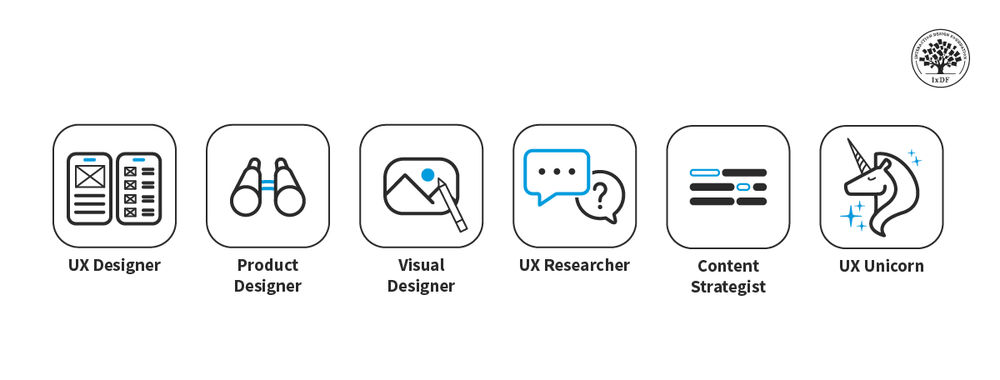
It’s hard to give a definitive answer to this question. You should exercise judgment and show the design artifacts and UX deliverables that you think best represent your skills and work. However, you may want to consider the 11 most commonly created and shared UX deliverables, according to Page Laubheimer, a researcher at the Norman Nielsen Group (2015).
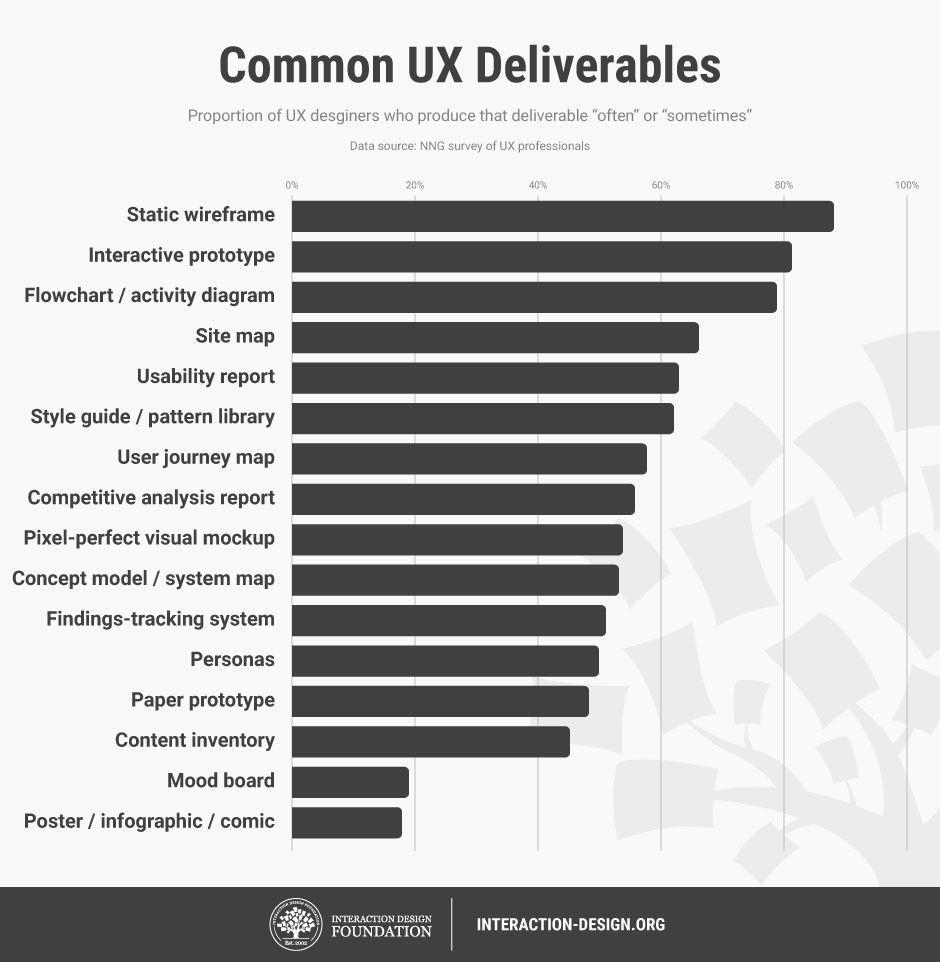
Author/Copyright holder: Teo Yu Siang and Interaction Design Foundation. Copyright terms and licence: CC BY-NC-SA 3.0
Alongside these, you may want to include photos of your work-in-progress, of your users and participants, and even yourself or your team at work. For this reason, remember to document everything and capture as much of the process as you are going through it, during an actual project.
Examples of good practice in combining text and visuals
Hopefully, you are beginning to see how text and visuals work hand in hand to deliver the story and give a convincing impression of you as a talented UX professional. Let’s now explore some creative ways in which you can put text and visuals side by side to build your case study. Remember that how you do this is, in terms of layout and visual presentation, entirely up to you. It’s only important that you not forget to answer the what, why and how-did-you-do-it questions.
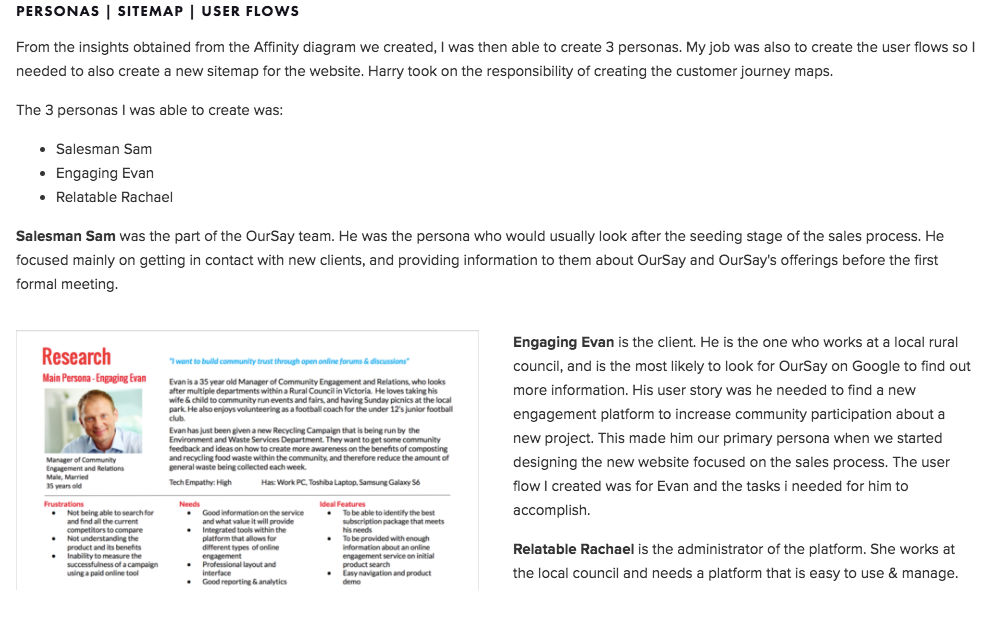
Copyright holder: Paula J. Young, paulajyoung.com. Copyright terms and license: All rights reserved (fair use). Img Src
In this example, the UX designer discusses how they created empathy with the users by developing personas. In the text, a summary of the personas is given. An accompanying visual shows how one of the persona deliverables looks. There is no need to put in all three personas – the recruiter isn’t interested in the project specifics, but is in seeing you following process and employing your rationale (explained in the first sentence). One visual is enough to show that you are capable of producing good UX deliverables.
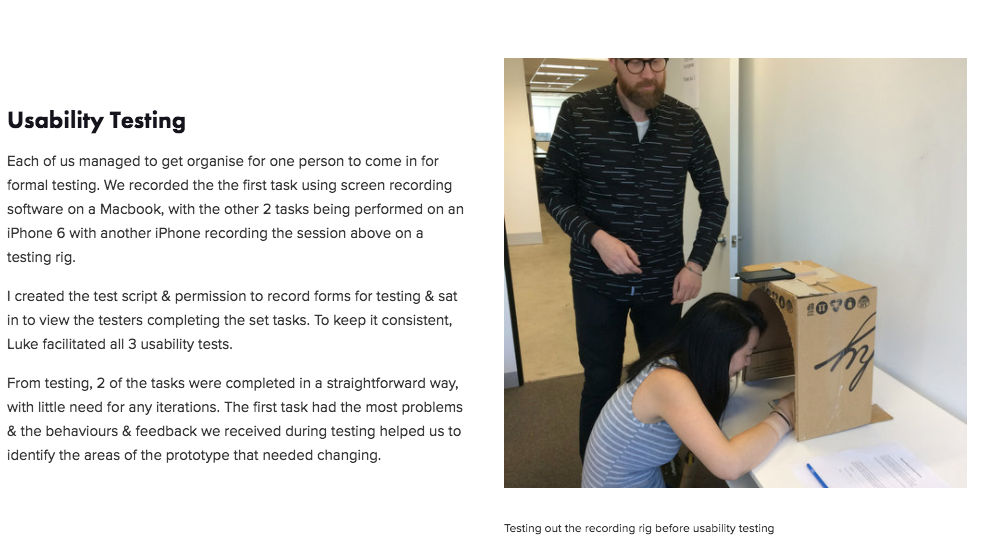
Copyright holder: Paula J. Young, paulajyoung.com. Copyright terms and license: All rights reserved (fair use). Img Src
In this example, the UX designer briefly describes the user testing methodology and some of the key findings. The accompanying visual is very powerful: Here, the designer demonstrates that they are capable of thinking outside of the box (excuse the pun!) so as to develop imaginative ways to test a product’s usability.
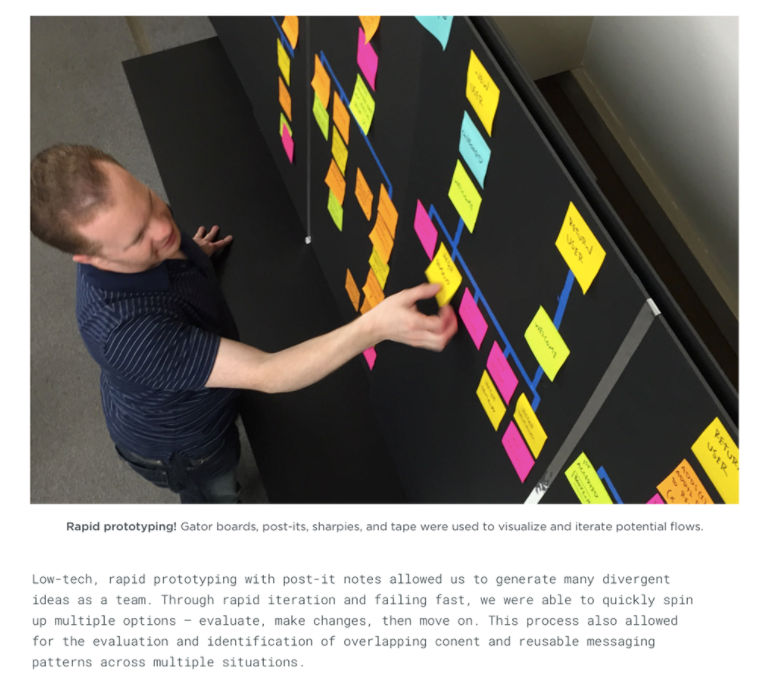
Copyright holder: Robert Sens, Behance.net. Copyright terms and license: All rights reserved (fair use). Img Src
In this example, the designer describes their process during the ideation phase. Not many details are given, but that’s OK – the focus is always on showing that you employed a certain strategy for a valid reason. The accompanying graphic doesn’t provide any further information about the project, but its power is in demonstrating that the designer is methodical and skilled in working through the ideation process described in the text.

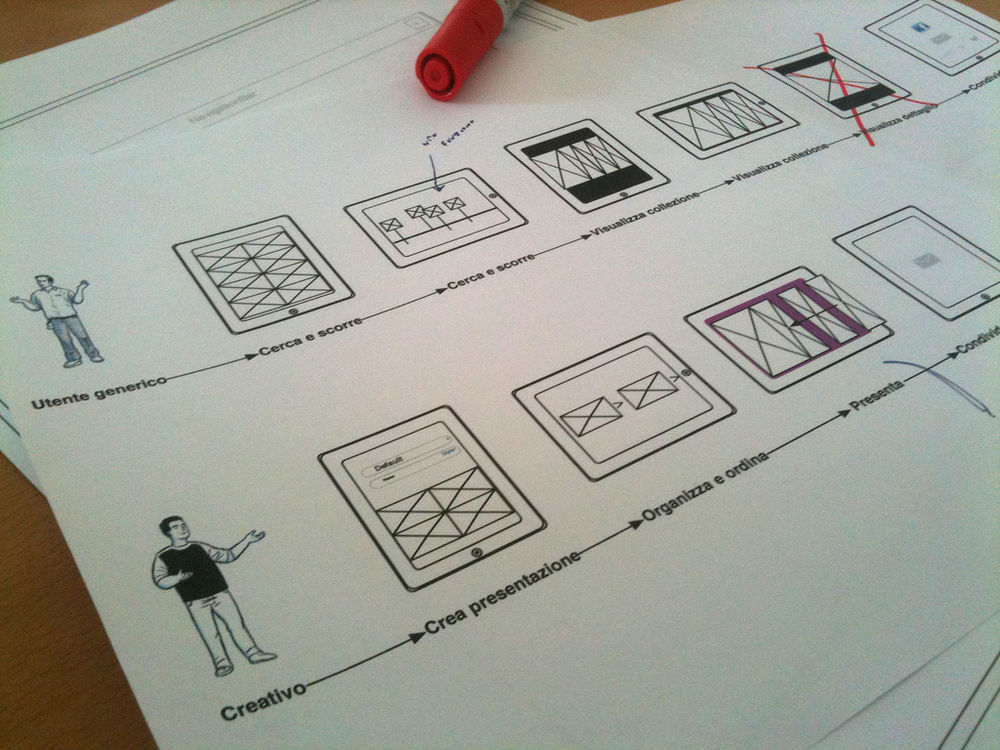
Copyright holder: Justin Edmund, jedmund.com. Copyright terms and license: All rights reserved (fair use). Img Src
In this example, the designer discusses the prototyping phase and demonstrates their skill in producing low-fidelity paper wireframes. Note how the wireframes are annotated: this helps the recruiter see that the designer is clearly thinking about the interface elements, their function and why they are laid out the way they are. Again, this demonstrates critical thinking, rather than just taking up space in the case study.
Writing tips for UX case studies
Now that we have seen how text and visuals can work hand in hand to help you explain your process and thinking, let’s look at some writing tips that will help you get the most out of your text.
Get to the point
Don’t waffle on with text. Be direct, keep your sentences short, and go straight to the point. Instead of getting carried away with long sentences like “The empathy-building phase is important because it allows the generation of requirements. During that phase I started off with a set of casual interviews…”—simply say this: “To build empathy with users, I started off with a set of casual interviews. This resulted in a preliminary set of requirements.”
Get personal
Remember that even though you need to acknowledge team work, you must also highlight what you did, so get personal. Instead of saying, “We worked together to produce a set of wireframes”, say, “As part of the team effort to produce wireframes, I created designs for functions XYZ”.
Remember the what, why, how
Actually, the previous example was only partial advice. Remember to include the what, why and how! Better yet, write: “Building on the requirements arising from customer journey maps, the team created wireframes to explore design alternatives. I created three alternative designs for functions XYZ”.
Use plain language
Don’t overcomplicate your text with esoteric jargon related to the project. Focus on the process and explain it as simply as you can. Not everyone who reads your case study will be a UX person – sometimes, managers or developers might be part of the interviewing team. Keep it human and you will keep it real.
Use active voice instead of passive
You might have some text like “wireframe mockups were created in the ideation phase”. Passive voice does indeed have a purpose (to put the subject of a sentence in the spotlight when it can’t do anything as an entity), but it has a nasty habit of sometimes making things appear quite vague (in the previous example, just who were these mockups created by?) and is more difficult to read and process than active voice. Instead, you could improve the clarity by writing in the active voice, like so: “I created wireframe mockups in the ideation phase.”
Use UX keywords
Remember – your recruiters probably won’t spend more than a couple of minutes looking through your portfolio (especially if they have lots of applications to review). For this reason, make sure that UX keywords, especially deliverables appropriate to each phase of the process in your case study, are things you use and highlight clearly. Since recruiters will probably skim through rather than read your text, having the right keywords in place ensures that your case study will catch their eye, and hopefully convince them that it’s worth a second look.
The Take Away
While you are undertaking a UX project, remember to capture as much of the process as possible by taking photos, scanning documents and saving files. When the time comes to write the middle part of a UX case study about this project, all of this material will come in handy. Writing the middle part of your UX case study requires a significant investment of time and attention. You must carefully pick the elements of work which you believe you should highlight. You need to weave a story and show, using an appropriate combination of text and visuals, how you understand and are able to apply a methodological approach to your work, like Design Thinking. It’s important that every sentence you write and every visual you include have a direct impact in answering the perennial questions in the recruiters’ heads: What, why and how?
References & Where to Learn More
Copyright holder: janeb13, pixabay.com. Copyright terms and license: CC0
Drugay, A. (2017). How to create a UX writing portfolio.
Motivate Design (2016). How to craft a top-notch UX case study.
Mederos, B. (2015). The foundation of a great UX portfolio.
Daukaeva, K. (2016). How to write a good UX case study.
Laubheimer, P. (2015). Which UX deliverables are most commonly created and shared?
UX For the Masses (2017). How to bring your UX work to life with compelling case studies.