Whether you are designing a mobile app, a professional online platform or an interactive museum exhibition, it is essential to understand users and the context in which they will use your design. Traditional methods such as interviews and observations will help you to touch the surface of their lives. A deeper understanding of what your users feel and dream comes from generative techniques such as context mapping. To use this technique effectively, you need to design the probes kit with care. Learn about the three key points you should pay attention to when preparing probes for context mapping so as to take your designs to the next level.
“Human-centred design is premised on empathy, on the idea that the people you’re designing for are your roadmap to innovative solutions. All you have to do is empathize, understand them, and bring them along with you in the design process.”
– IDEO field guide to human-centred design, 2015
People are experts in and regarding their own lives and experiences. The understanding of users in their context is essential for creating truly innovative products. In the early stages of a project, we as designers can use the context mapping technique to inspire and to build empathy. Froukje Sleeswijk-Visser, who is a design researcher and one of the founders of the context mapping technique, describes that this technique:
- Allows designers to get to the latent needs, dreams and aspirations of a target group.
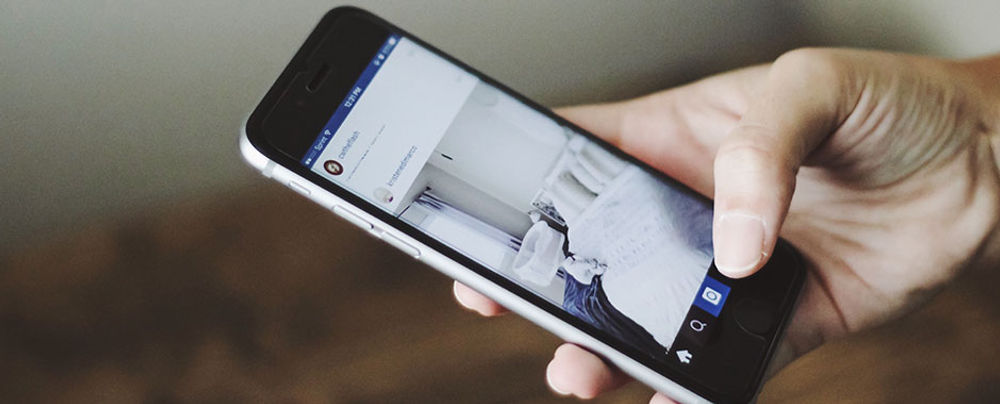
- Includes probes that enable users to show you their world, their reflections on it and their dreams about its future, all in an active way.
Probes for context mapping are exercises we give to a target group in a design project; from these, we can get an understanding about their lives. The purpose of probes is to inspire us as designers at the starting phases of a project and to sensitize users to their own context. The way in which you set up the exercises is essential for eliciting the desired rich information.
A typical probes kit includes materials for activities over a short period. They evoke personal responses to a stimulus or a question. You need to design probes that playfully invite users to share rich clues about their lives rather than gather factual information about them.
 Copyright holder: Priscilla Esser and Interaction Design Foundation, Adapted from Froukje Sleeswijk-Visser, Pieter Jan Stappers, Remko van der Lugt, and Elisabeth B.-N. Sanders, Context Mapping: Experiences from Practice. CoDesign, Vol. 1, No. 2, June 2005, 119–149. Copyright licence: CC BY-NC-ND
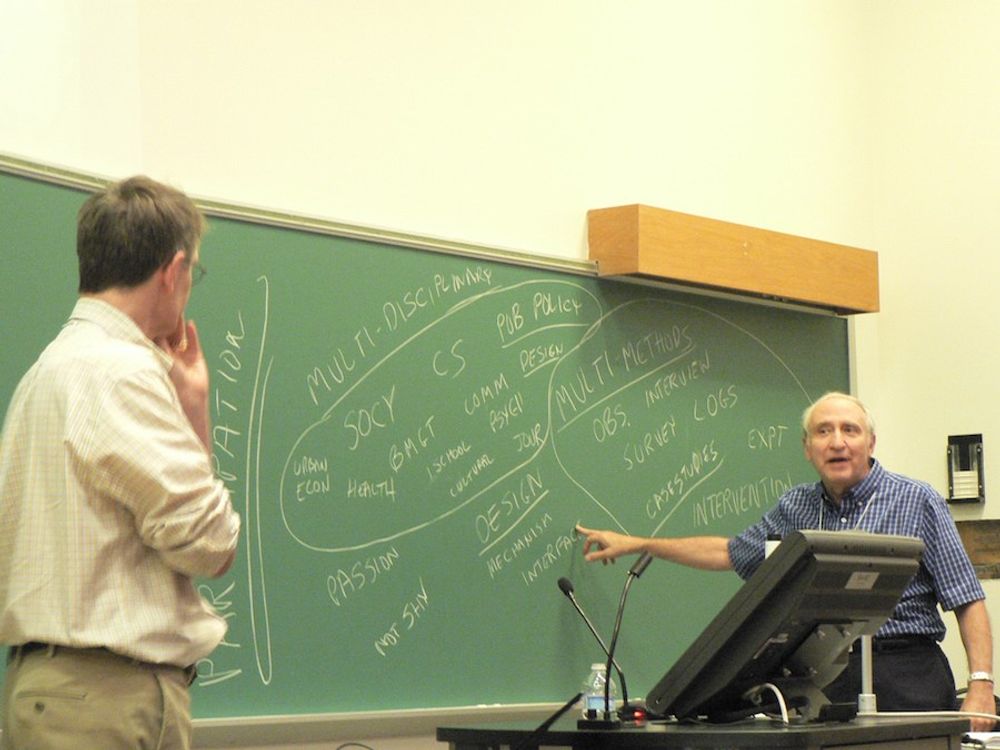
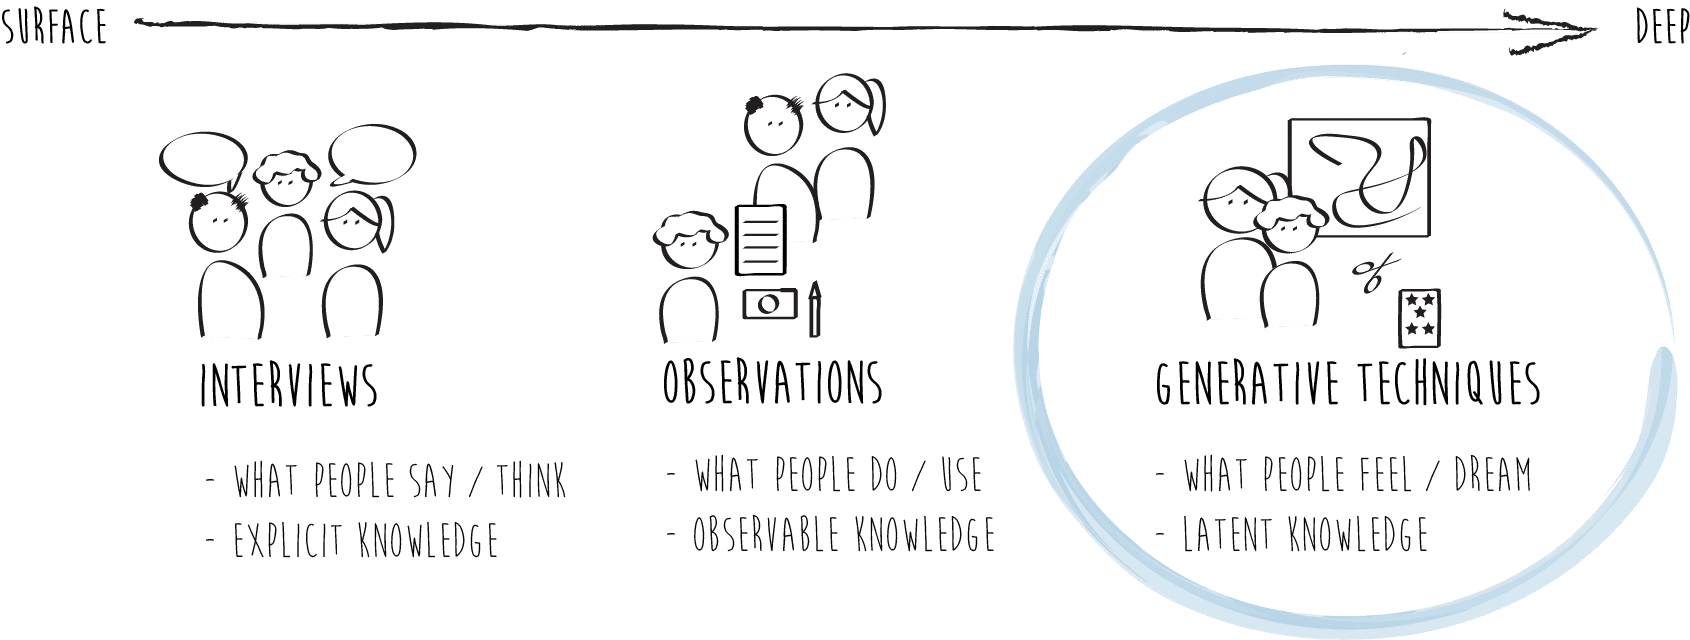
Types of user research in the early stages of design. Context mapping is a technique that falls in the category of generative techniques, allowing us as designers to get to a deeper understanding of what users know, feel and dream. In generative techniques, users actively participate in generating ideas that can serve as a starting point for the design process. Adapted from Froukje Sleeswijk-Visser, Pieter Jan Stappers, Remko van der Lugt, and Elisabeth B.-N. Sanders, Context Mapping: Experiences from Practice. CoDesign, Vol. 1, No. 2, June 2005, 119 – 149.
The Three Stages in the Context Mapping Process and how to develop the Best Probes to Fit into it
The context mapping procedure involves three stages:
- Preparing and developing the probes: We will share the essential three steps, which will help you get started in the best possible way, and you will learn which three types of probes usually work well.
- Collecting: The main stage is where you collect the insights from your users, who will have your probes kit with small exercises and live with it for a few days. You will then use the results as input for the generative session where your goal is to get to a deeper understanding of what your users know, feel and dream through the ideas they generate.
- Communicating: Analyzing and sharing the insights with the design team or other stakeholders in the project concludes the context mapping process and ensures that the design process continues in the right direction.
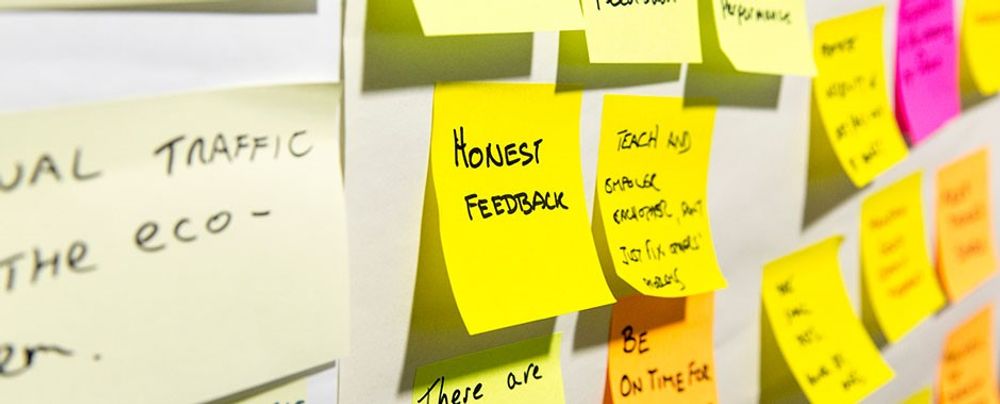
To collect the best insights from users and get them in the right mind-set, you must have proper preparation. You need to collect feelings rather than facts, ambitions rather than tasks. For you to get rich details, the preparation phase should pay attention to three key steps.
 Copyright holder: Priscilla Esser and Interaction Design Foundation, Adapted from ID Studiolab, Context Mapping & Experience Design, 2008. Copyright licence: CC-BY-NC-ND
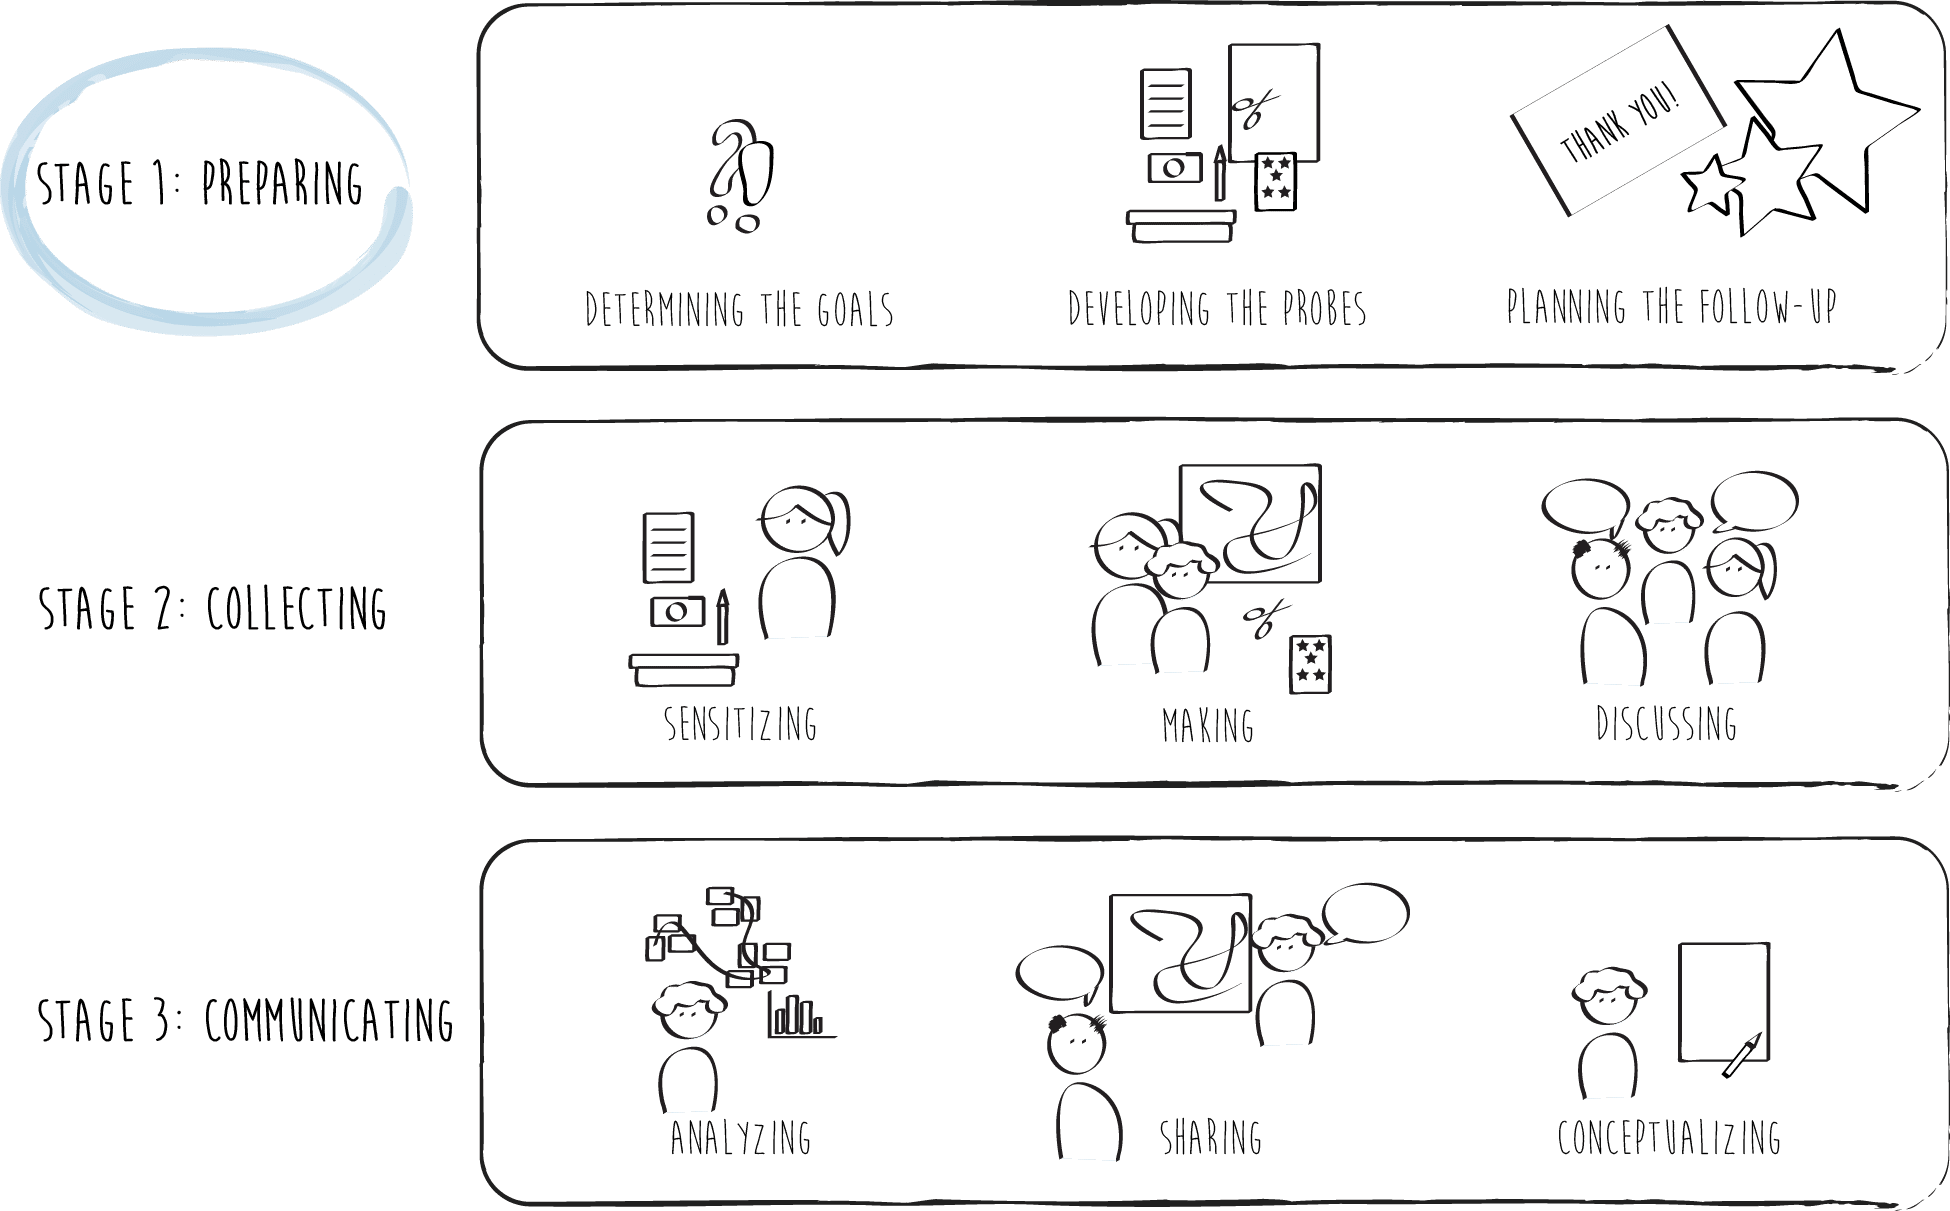
The process of the context mapping technique involves three stages: Preparing, collecting and communicating. The preparation stage is essential to the two following stages. We will now see how to prepare probes for context mapping in more detail. Adapted from ID Studiolab, Context Mapping & Experience Design, 2008.
Stage 1. Preparing – How to Prepare Probes for Context Mapping
Preparing – Step A
Start by clearly stating the goal of the cultural probe and selecting probe types that match your users. As with any design research method, determining what you need to know is the most important step. For example, when designing an interactive experience to get asthma patients out to exercise, you may need insights into their social lives besides their walking habits. And when you design an online library platform that seduces students to read more relevant literature, you may need insights into their internet activities throughout the day along with their study behaviors.
The trick is to remain broad enough to inspire design, while remaining focused on the design problem at hand. Depending on the goal and your target group, some probes and exercises will be more successful than others. If probing commuters is your goal, you should design a probes kit they can easily take with them. If you want to understand 2nd-grade school teachers, however, you should use a probes kit that focuses on exercises in the classroom.
Key questions to help you get started:
- What is the goal of the cultural probe? What do you need to know?
- Which probe types match your users?
Preparing – Step B
Create the kit in a way that you slowly sensitize your users and take them along in your line of thinking.To get participants in the right mind-set and have them reflect on their lives, you need to ease them into it.
The best ways to approach your participants:
- Help them go from descriptive to imaginative. By starting with gathering some factual information about their habits and contexts, you prep their minds by having them think about it in a way they normally don’t. They will start being more perceptive of their environment—and they will start paying attention to the things you need them to. For example, by starting them with exercises such as mapping out their workflow on a particular day or taking pictures of their meals, you can later ask them what eating goals they would like to achieve, or what support they would need to get a healthier lifestyle.
- Help them go from the present to the future. By starting with recollecting concrete events and activities (for example, the last time someone has made a large purchase) and then describing and visualizing current behaviors (such as mapping all the incidences of cash payments), the participant is more likely to think about what he would like to see differently in the future. As a designer, you should probably take these steps automatically in your head when someone asks you what a future payment service for people on a tight budget would be. Your users have the ability to give you those insights, as long as you take them with you in the proper steps.
Preparing – Step C
Design for the ending of the probes: decide how to follow up after collecting the probes kit. Your users have put a lot of effort into fulfilling the exercises. Rather than having them send their completed pieces to you in the mail, you should consider ways to make it more personal. If possible, collect the probes kits in person, to show your commitment to them. This will keep them engaged, and it provides you with the opportunity to get them enthusiastic about the generative session you may be hosting afterwards.
“Even with a one-day study enough time needs to be made for the sensitizing process for users, researchers, designers and other members of the team.”
– Sleeswijk-Visser et al., design researcher at Delft University of Technology, 2005
Key questions to help you end the probes:
- How will you collect the probes kit?
- How will you follow up after collecting the probes kit?
Example of a bad Probes Kit
Imagine having a design project aimed at improving the experience of hospitalized children suffering from cancer. The context of a child oncology ward is hopefully unfamiliar terrain for you, so you need to do research. The aim of this research is to get insights into how the children experience the environment, whom they like to share the experience with and what would trigger them to be happier, more active and positive.
You know from a short interview with the head nurse that they spend days on end in bed, bored and lonely. Building upon your experience with children, you decide to design some probes that would fit their age group. It starts with a drawing exercise, where they’re asked to draw their daily routine on a timeline, including the people they meet. Then, a photo assignment asks them to take pictures of their favourite parts of the ward. A writing task allows them to write what they would like a day in hospital to be like. Finally, they can draw their perfect hospital room on a pre-printed map—sounds like something a child might enjoy, right?
However, when you retrieve the probes kits from the children, they are sleeping. And their mums and dads explain to you that they have been too sick to do all the tasks. In the end, they have tried to write down the daily routines for you themselves. What went wrong?
You had a clear goal and created the kit to take the children gradually from descriptive to imaginative and from present to future. You explained everything in person and were always available to answer any questions. They knew you would be coming around today. Nevertheless, you didn’t grasp the impact of the disease on each child. It’s time for an iteration.
Copyright holder: Priscilla Esser and Interaction Design Foundation. Copyright licence: CC BY-NC-ND
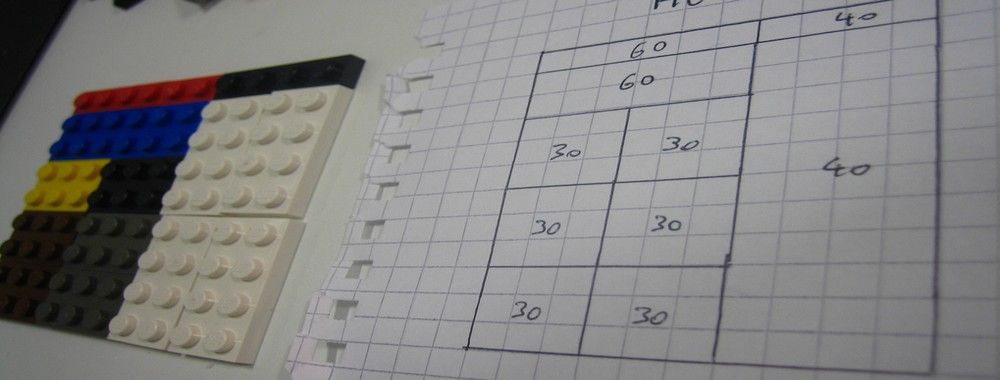
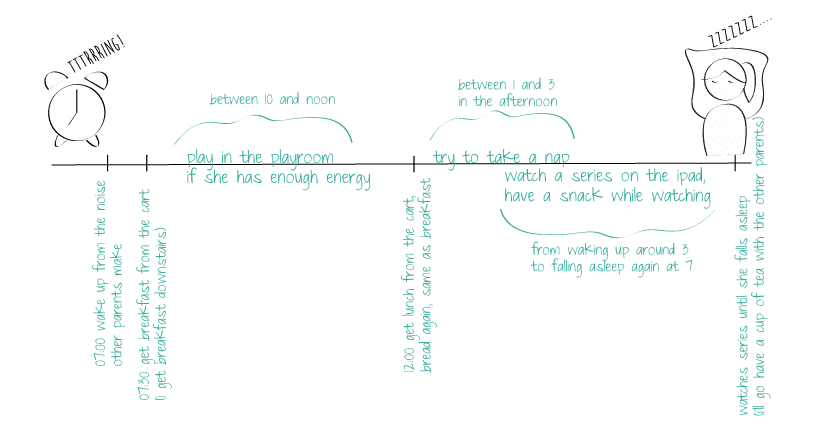
Example of a timeline that could result when parents help their children do the probe exercises while staying in hospital. If this is the only result you get from your probes kit, it is not giving you more inspiring information than an interview could have done. If this turns out to be the case, it is essential that you redesign your probes kit.
Example of a good Probes Kit
The main things you realized from the failed attempt were the constant presence of the parents and the role they play. For the next version of your probes kit, you include them in the exercises. Also, all tasks are fit for lying in bed, and you take more time to allow for bad days where the child will do nothing but sleep. The redesigned kit starts with pictures the child takes of anything he wants in his hospital room. When he can take at least seven pictures, his parents will give him a prize: a cuddly toy that’s included in the kit. Then, the child can draw a circle around his favorite places in the ward on a map. The parents then have to visit that place and guess what the favorite item is. For every good guess, the parents will receive a sticker from the child they can stick on their clothes. The child is also asked to write a postcard to someone he would like to spend time with in hospital, describing what he would like to do. Finally, the parents can read their child a story, written with the patient as the hero. Parts of the story invite the child to engage and fantasize about how the story would unfold. These clues give you all the insights you need into these youngsters’ dreams and wishes.
As you collect the probes kits this time, you encounter smiling mums and dads, explaining to you how they enjoyed working on these assignments with their children. It has taken more time than anticipated, but you finally have the rich insights you need to design something that will truly make a difference in these troubled lives.
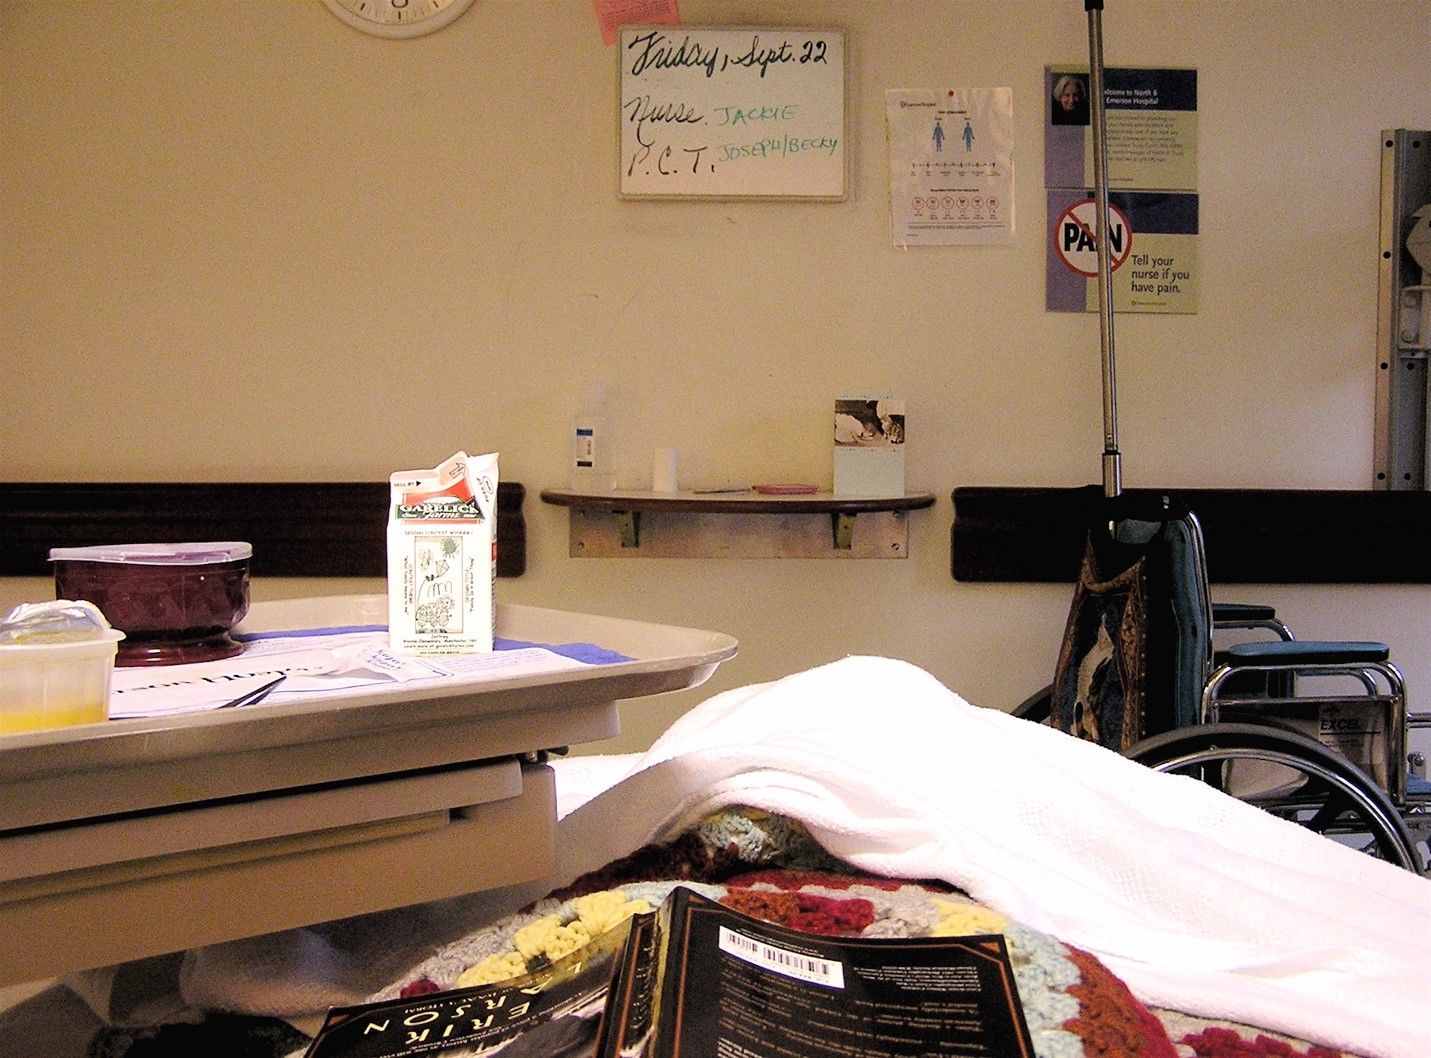 Copyright holder: Liz West. Copyright licence: CC BY
View from a hospital bed, as an example of the results that could come out of a good probes kit. By taking pictures, users can give us insights into their lives and inspire the design process. This picture, for example, shows a lack of personalization in hospital rooms. This can open up a whole new design direction for improving the hospital experience for children.
Best Practices: Three Types of Probes that usually Work well
As designers, we typically create probes to gather information over time. Best practice: many of us choose a one-week time frame as participants often do not want to be engaged if the process is too long, but you should adapt it to your target group’s needs. Each assignment should take no more than five to ten minutes per day to complete (or less, as became obvious in the child cancer example). You may find the following probes useful in numerous projects:
- Writing and drawing about events or objects in their context. Have participants write a short story on a particular aspect of their day or a specific event in the past. To provoke a certain type of text, you can provide specific formats for the texts, such as postcards or small diaries. Provide paper and pencils for participants to draw what’s in their heads rather than what’s objectively observable. Drawing is perfect for gathering their subjective experiences. Make people feel comfortable by giving examples of non-intimidating drawing styles.
- Taking a photograph of their situation on set times in a day. Give a focused assignment with subject, type and number of photos. Possibly give them a trigger via text message when the timing of the picture is essential. If your target group has smart phones, you should, of course, take advantage of it.
- Mapping their daily routines and the feelings they generate. Provide maps of indoor or outdoor areas relevant for the subject. Also, provide pens or pencils to write and draw on the maps. If you want to know about their feelings and experiences, have some spaces around the maps to make notes. The mapping exercise can be part of a photograph assignment. For example, you can ask them to take pictures along their route to work and indicate on a map where they took the pictures.
Stage 2. Collecting – The Main Stage
Now you’re ready to go to the next stage in the context mapping process where you can start collecting the insights from your users.
Collecting – Step A
First, you will give your users your probes kit with small exercises, and they will live with it for a few days. This step is called sensitising, as it helps users get sensitive to their own context and viewing it in a more conscious way. They will fill the kit with all the rich goodness you need as input for your design process. When you get the kits back, you will have a field day going through them all. You should lay the kits out in front of you and try to see patterns. Pieter Jan Stappers and Elisabeth Sanders, experts on generative research methods, advise you to label every piece of information for future reference every time. You can do this by recording the who (including the participants’ names), where and when of the data.
Collecting – Step B
You will then use the data as input for the generative session. Although users are experts in their own lives, they are not designers and thus not used to thinking about designs that do not exist yet. The kits will have sensitised your users, so they are more prepared to think about the future and create solutions themselves. In the generative session, you help users create ideas.
Collecting – Step C
Lastly, you need to start a discussion with the users. With the probes kits, they have given inspiring insights and fragments of their lives. In the generative session, they have created new ideas on what would work in their context. You should complete this information by understanding the reasoning behind it. Having an open discussion will allow you to get this understanding.
Stage 3. Communicating – the Final Stage
Finally, after collecting all the inspiring material from your users, you need to analyze it. Sometimes, patterns or clusters will emerge. Other times, a single picture or quote will stand out. Regardless of the types of insights you come up with, or how you found them in the rich data, you need to communicate them. Fellow design team members will need the insights to push the design process in the right direction. Other stakeholders may need the insights to internalize the need to innovate.
According to Pieter Jan Stappers and Elisabeth Sanders, a challenge in this stage is to communicate the insights in a way that reflects the dreams and aspirations of your target group while respecting their privacy.
The Take Away
The context mapping procedure involves three stages:preparing, collecting and communicating. Preparing the right kind of probes kit is essential for gathering rich insights into your target group that will inspire the early stages of design. Three key steps you should consider when preparing and designing a probes kit are:
- Always start by clearly stating the goal of the cultural probe and selecting probe types that match your users.
- Create the kit in a way that slowly sensitises your users and takes them along in your line of thinking.
- Design for the ending of the probes: decide how to follow up after collecting the probes kit.
As designing a probes kit is like any other small design task, you should try out your probes kit and adapt the set of exercises when it doesn’t fit your design problem or target group as anticipated. Through the rich data they provide in the probes kits, your users will actively give you inspiration for the design process. Finally, you need to communicate the insights to other design team members or stakeholders—to ensure that the design process takes the right direction.
References & Where to Learn More
Hero Image: Copyright holder: Gunnar Bothner-By. Copyright licence: CC BY / Enhanced brightness from original
Froukje Sleeswijk-Visser, Pieter Jan Stappers, Remko van der Lugt, and Elisabeth B.-N. Sanders, Context Mapping: Experiences from Practice. CoDesign, Vol. 1, No. 2, June 2005, 119–149.
Pieter Jan Stappers, and Elisabeth B.-N. Sanders, Convivial Toolbox: Generative Research for the Front End of Design, 2012.